If you're diving into AI voice agents for the first time and want to create your intelligent calling assistant, Dialora makes it simple. Whether you're running a clinic, managing customer service, or experimenting with voice workflows, setting up your first voice agent on Dialora is straightforward. This guide walks you through the entire process step-by-step, ensuring you can launch your agent confidently and quickly.
Step 1: Sign Up and Log In to Dialora
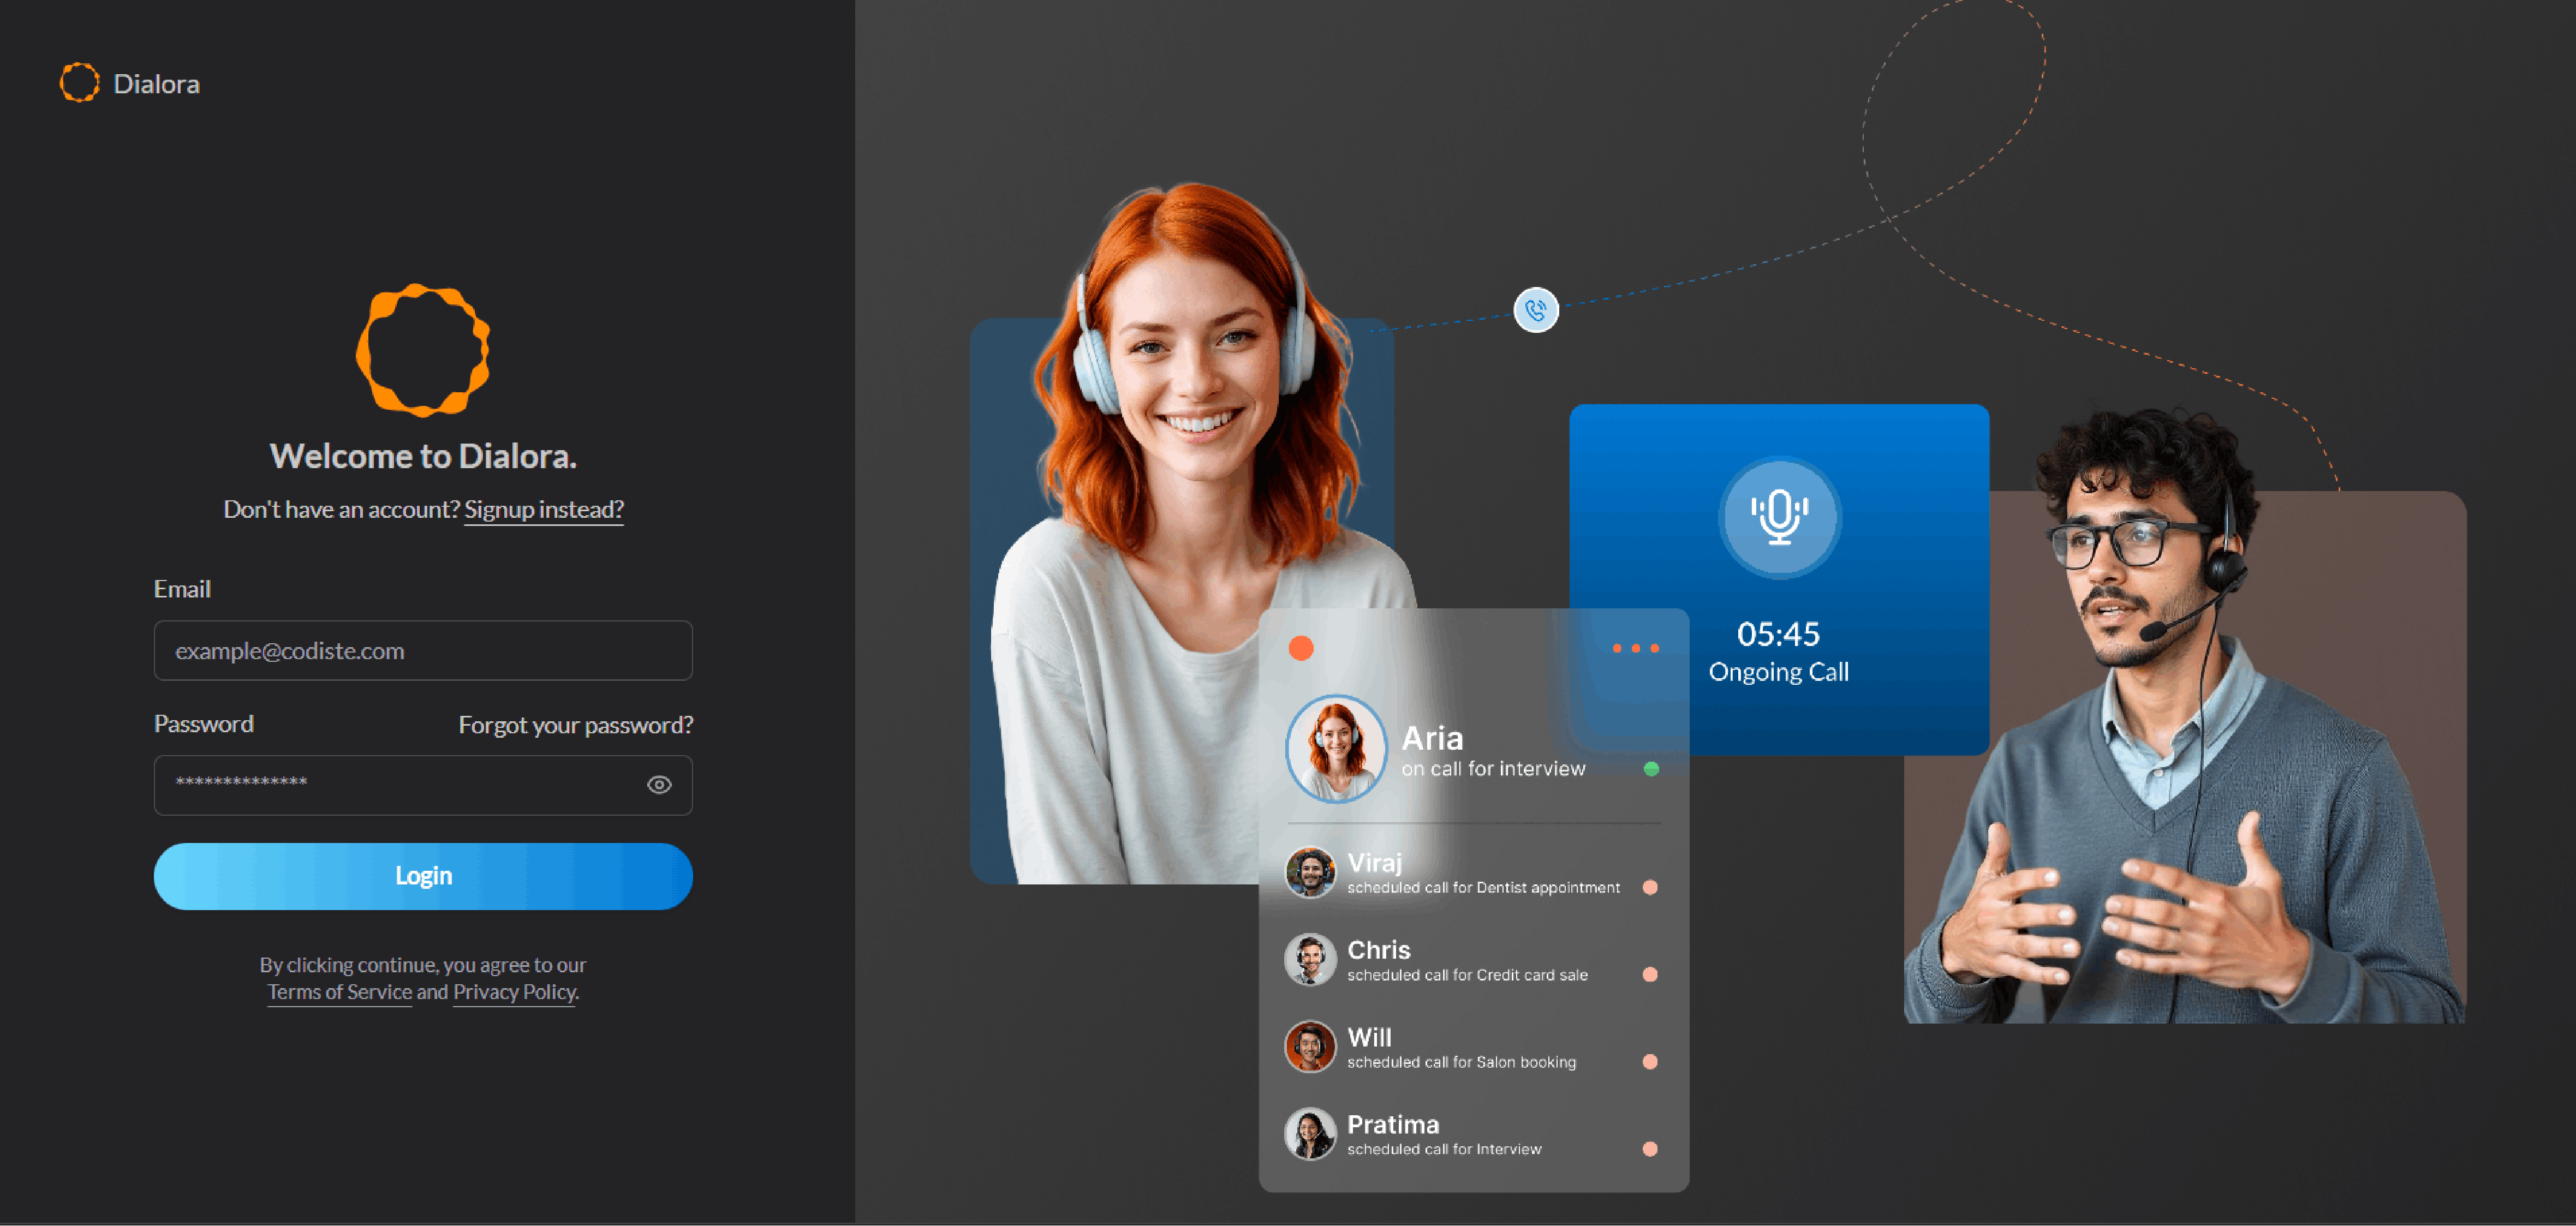
Start by heading over to Dialora.ai. You’ll see the Sign Up and Log In options in the top right corner of the landing page.
Once you’ve signed up and logged in, you’ll be directed straight to your Dashboard.
Step 2: Purchase your New Twilio Number
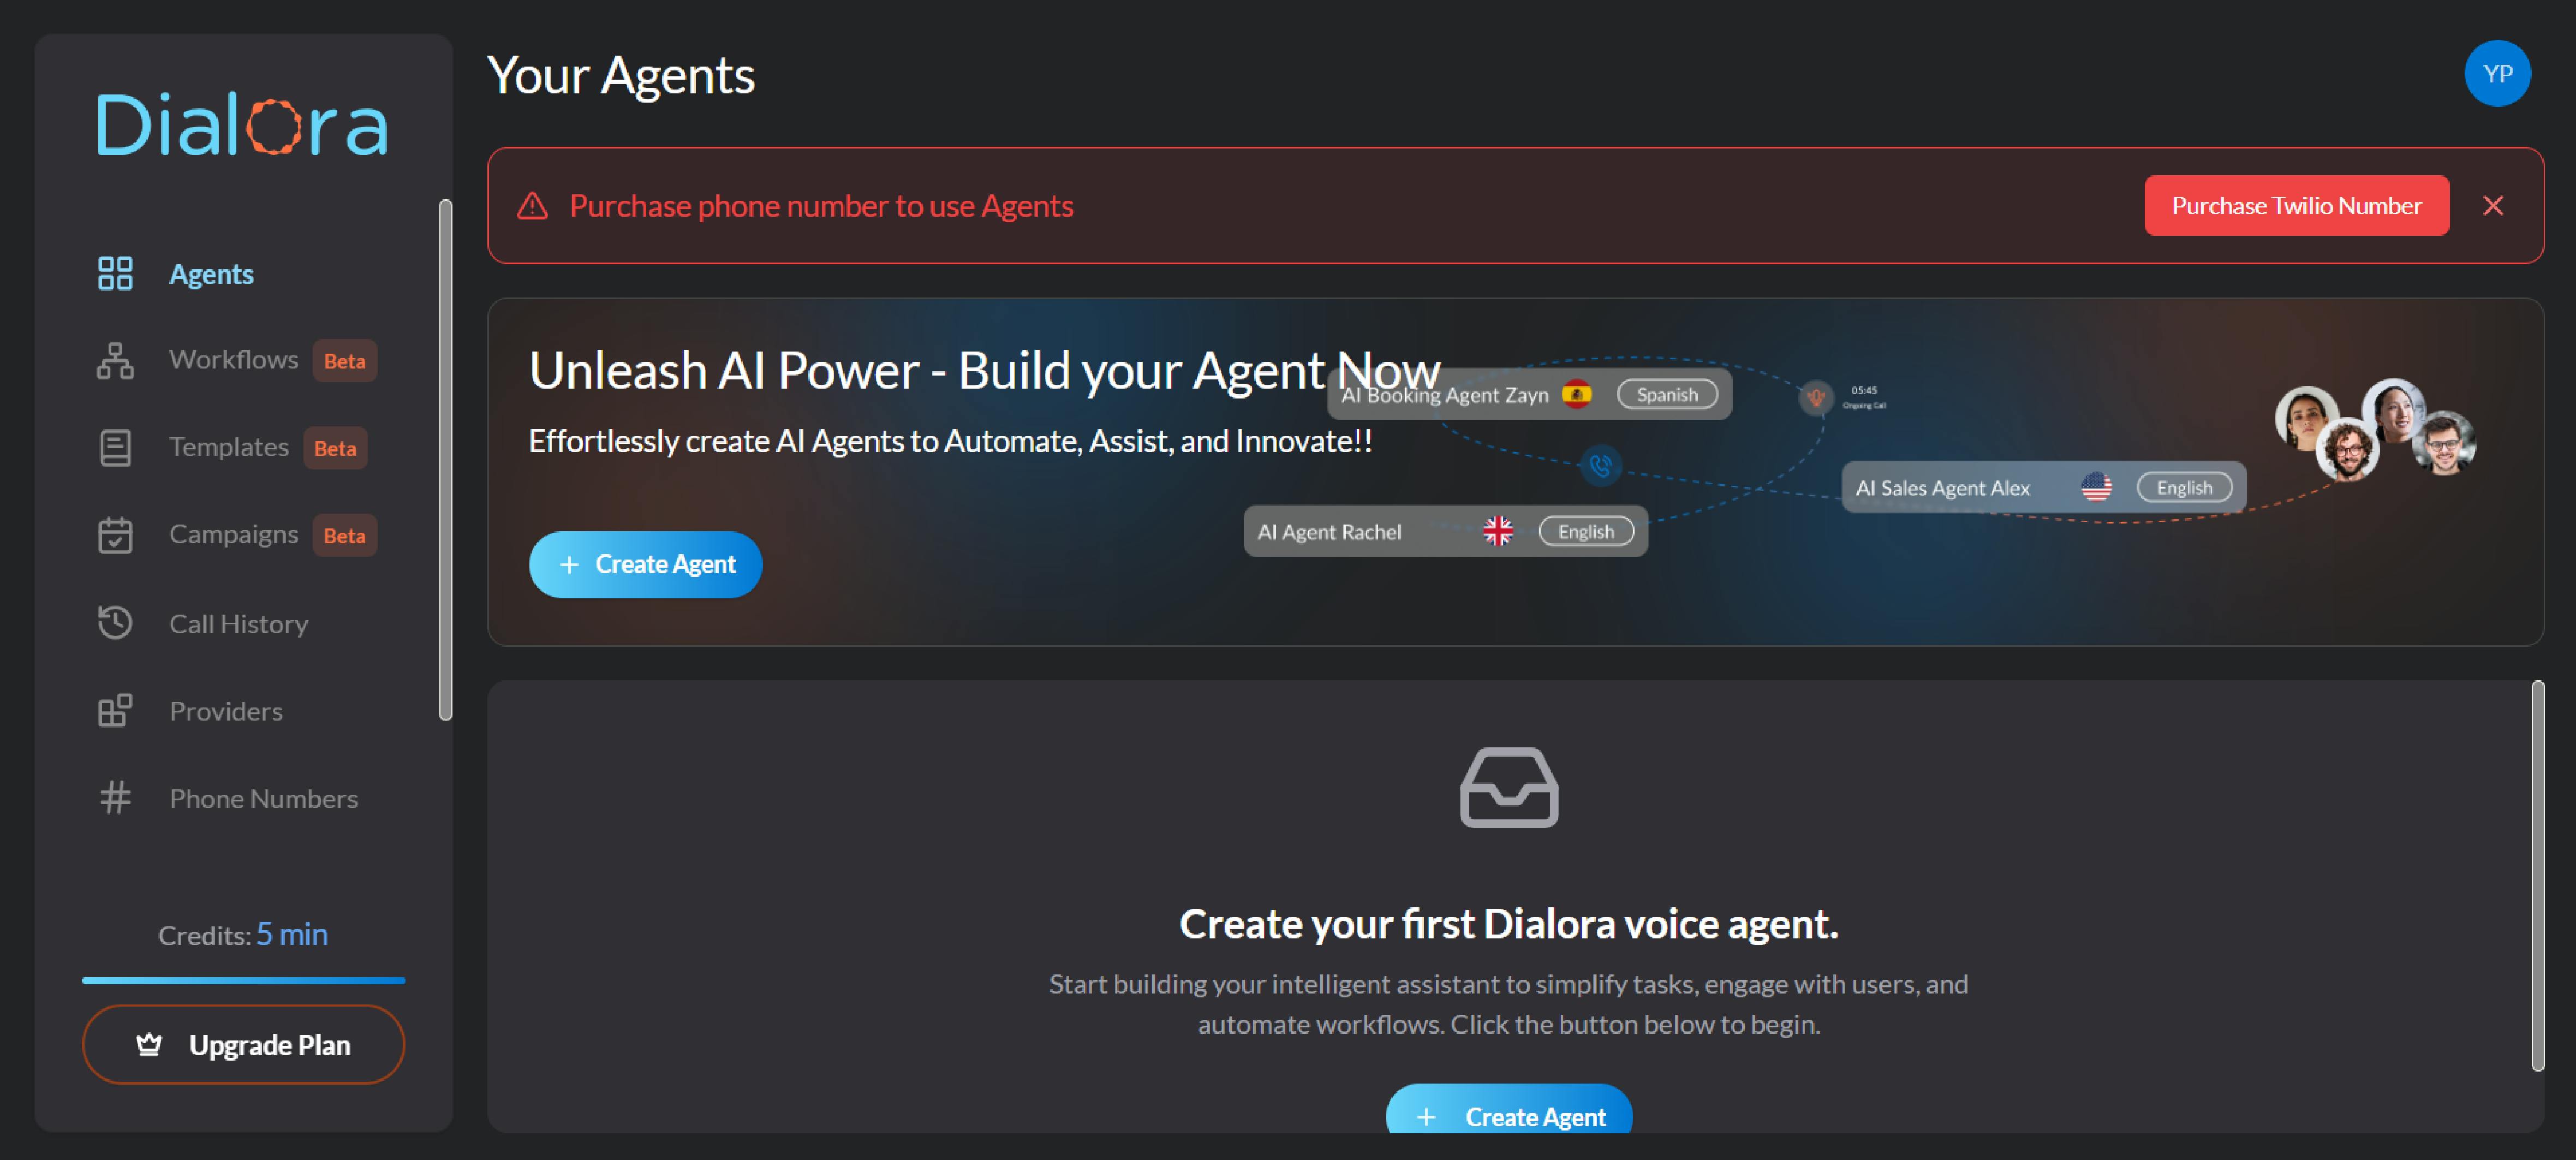
After logging in, make sure to buy a Twilio number. This number will connect you to customers and make outgoing calls.
You may do this in two ways. You'll see a red pop-up on top of your dashboard suggesting you can buy a number button (Purchase Twilio Number).
Click it to go to the dashboard and choose a number by searching via country, pin, or region and click "buy" at the top right. Your purchased number may appear on "My Number" following a purchase. You can see all the numbers your business needs here.
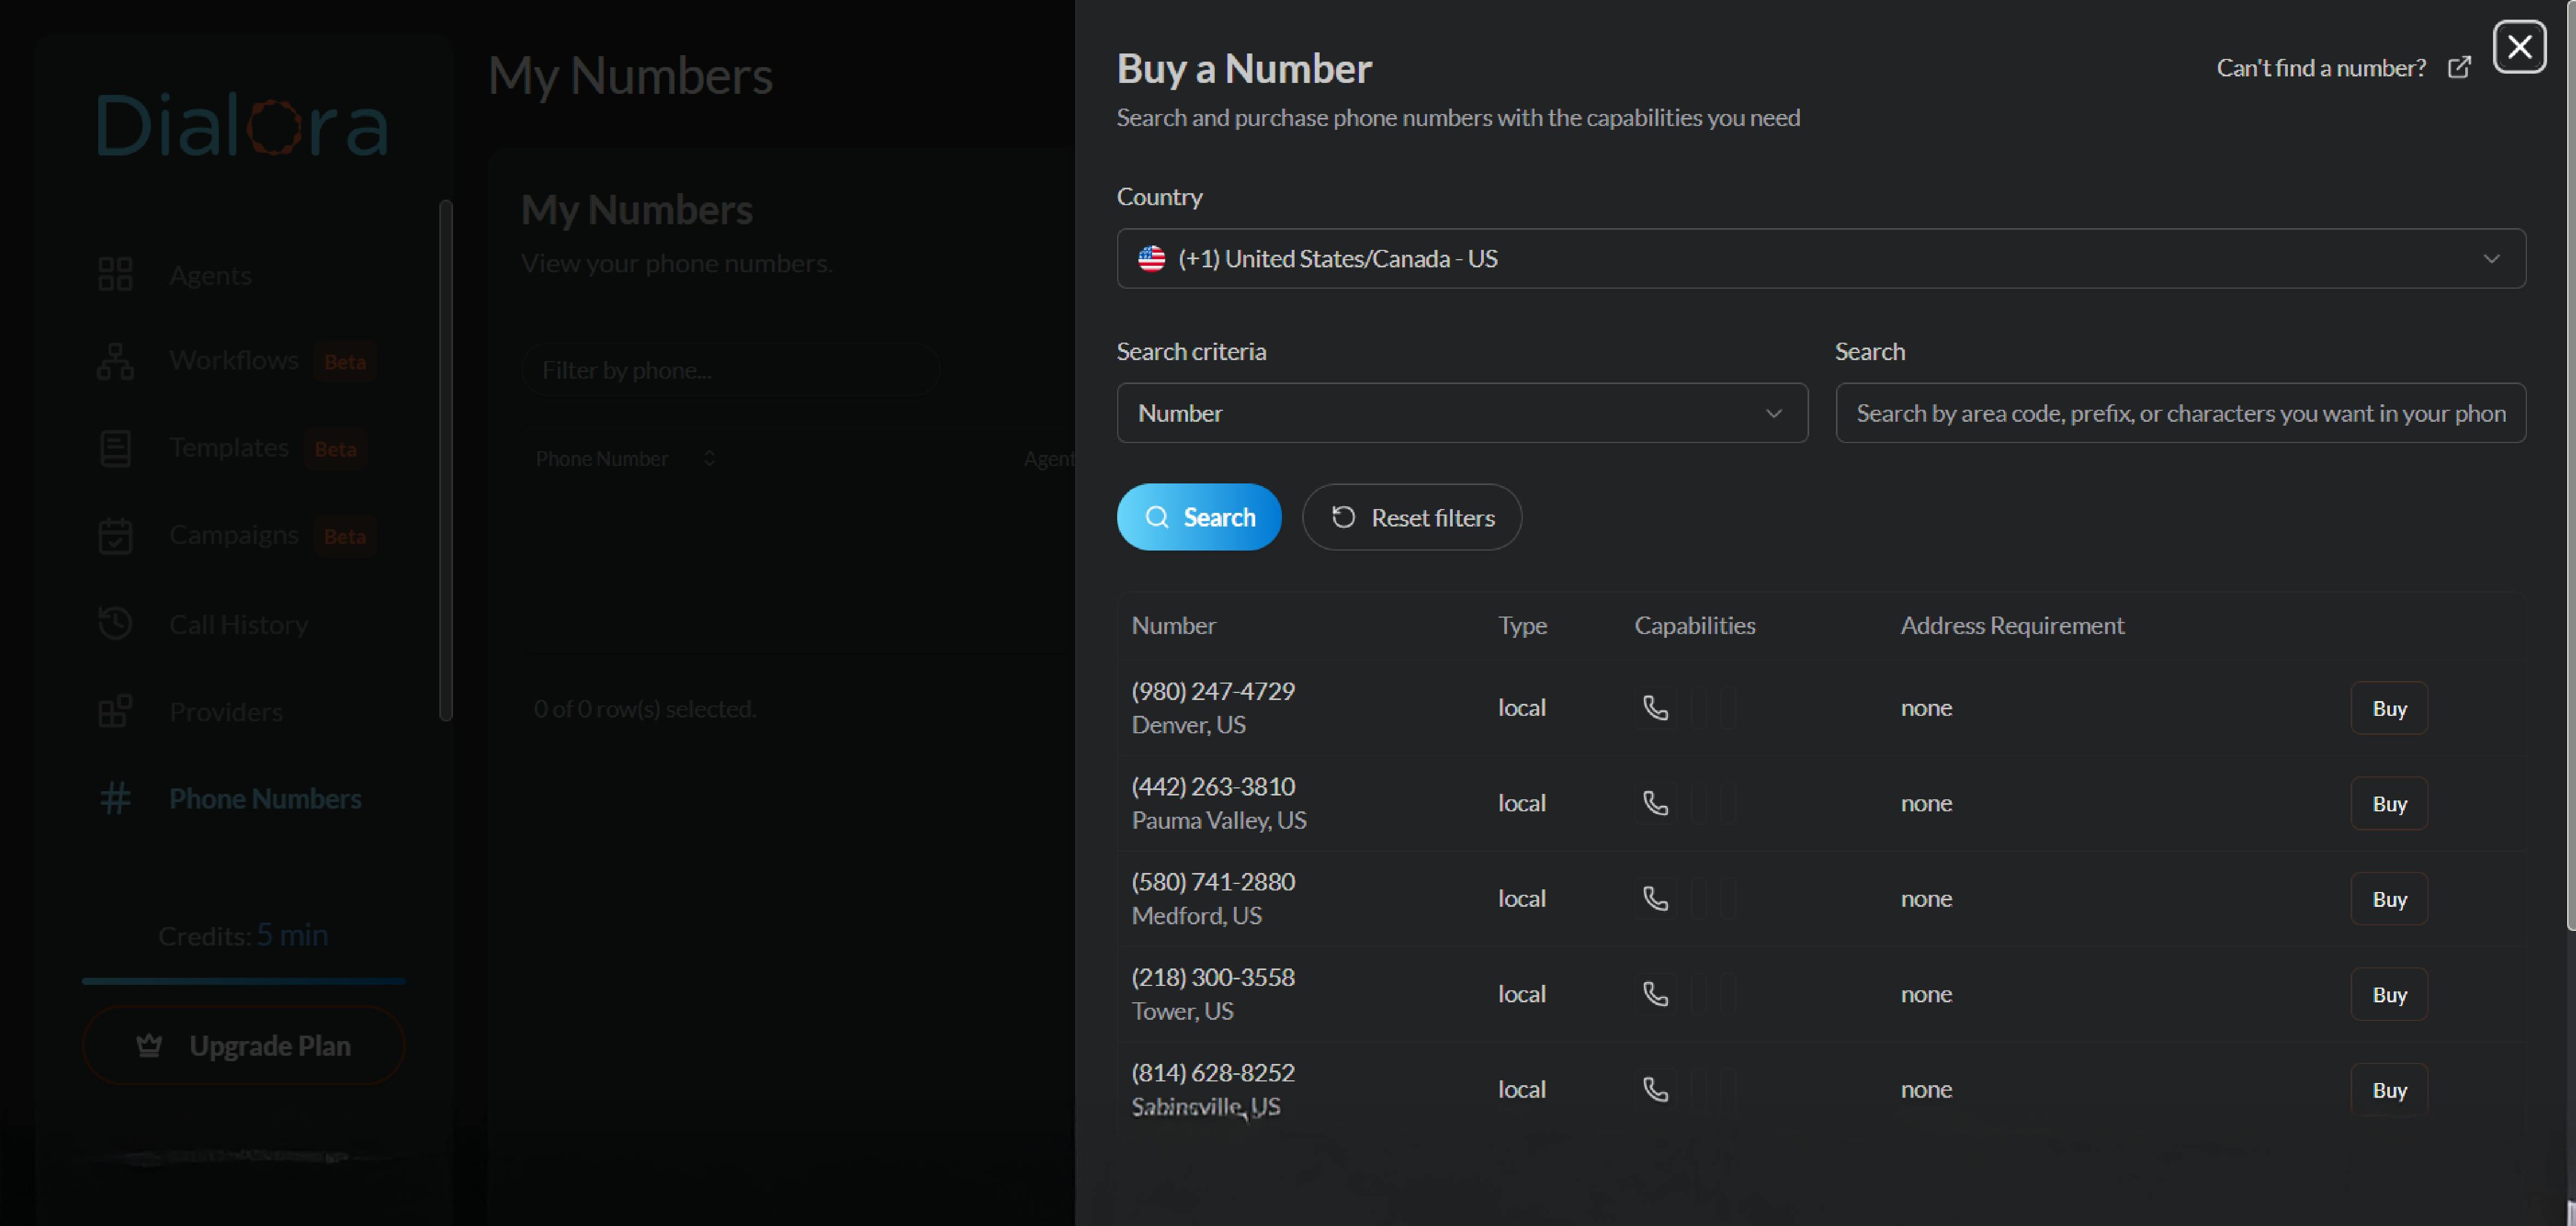
On the left side panel, a Phone Number tab offers another way to purchase the number; however, the process stays the same.
Step 3: Navigate to the Create Agent Button
On the left-hand menu of the dashboard, you’ll notice various options such as Workflows, Campaigns, Call History, etc. To create your voice agent, simply click on the Create Agent button.

Then, on the Dialora dashboard, you can check two options as follows:
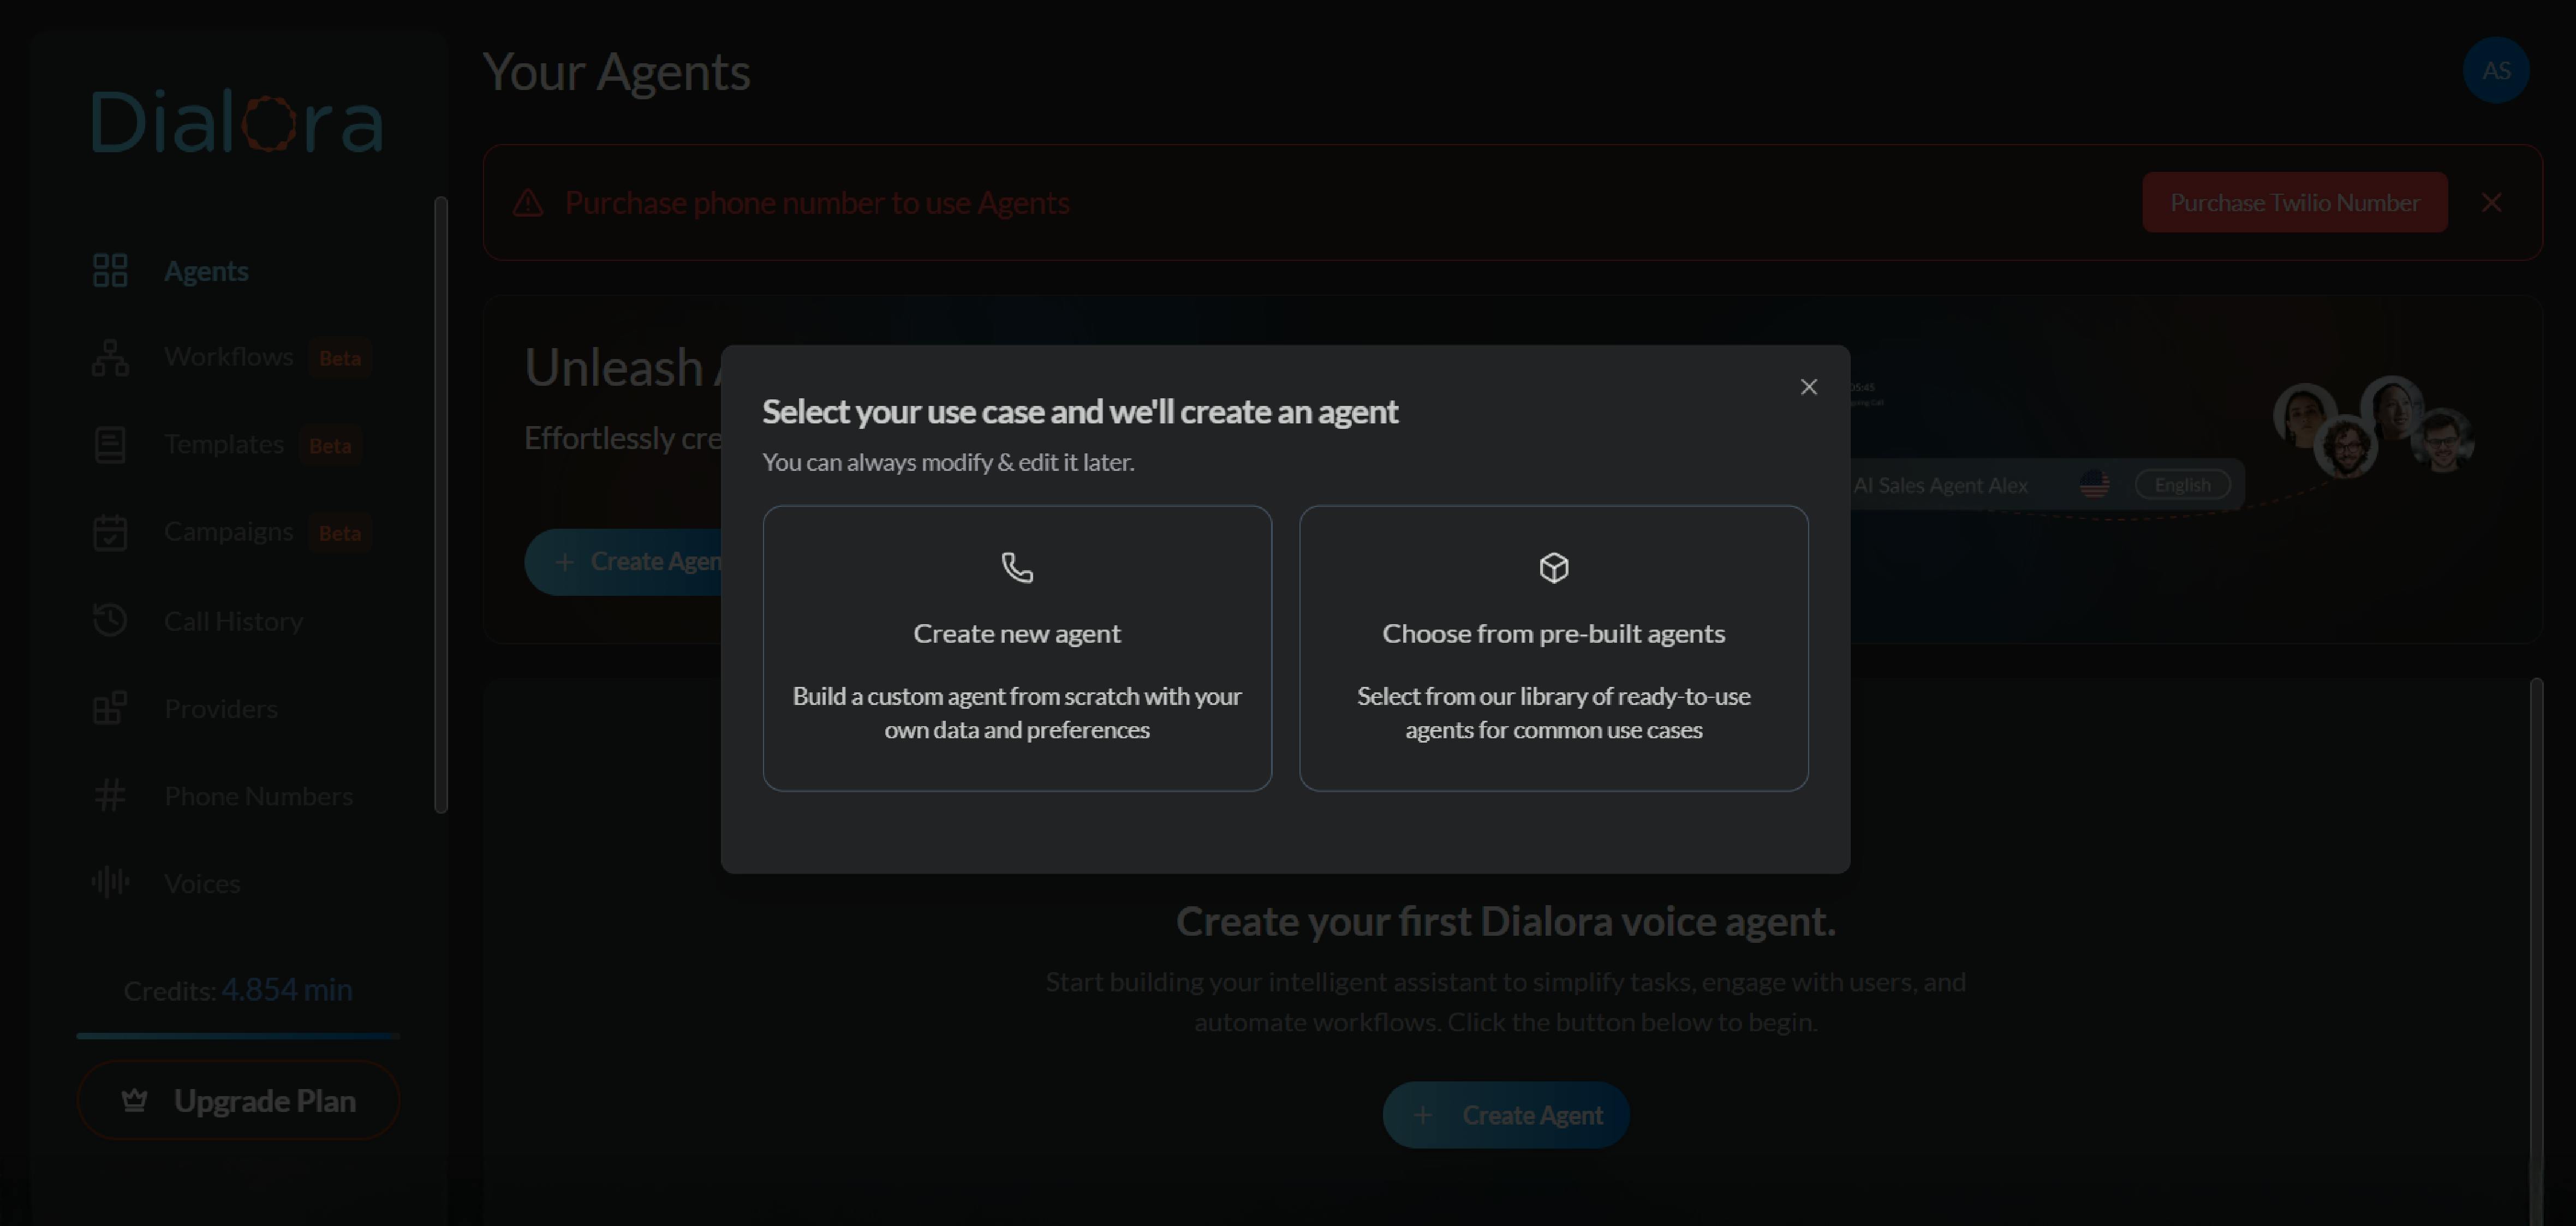
1) The option to either build from scratch
2) Use a pre-built template. For our example
let’s create a new agent.
Step 4: Enter Basic Agent Details
To tailor the agent to your needs:
- Give your agent a name, e.g., "KD Dental Clinic"
- Enter the company name (can be the same)
- Define the goals of the agent. For example:
Answer general queries about clinic timings, services, and treatment options
Handle calls with at least 90% accuracy
Escalate urgent or complex calls to a human
Click Next to proceed

Step 5: Connect a Phone Number and Optional Integrations
You’ll now be prompted to connect a phone number. Simply select one from your list of available numbers.
If needed, integrate third-party platforms like:
- Make.com
- Zapier
- Pipedrive
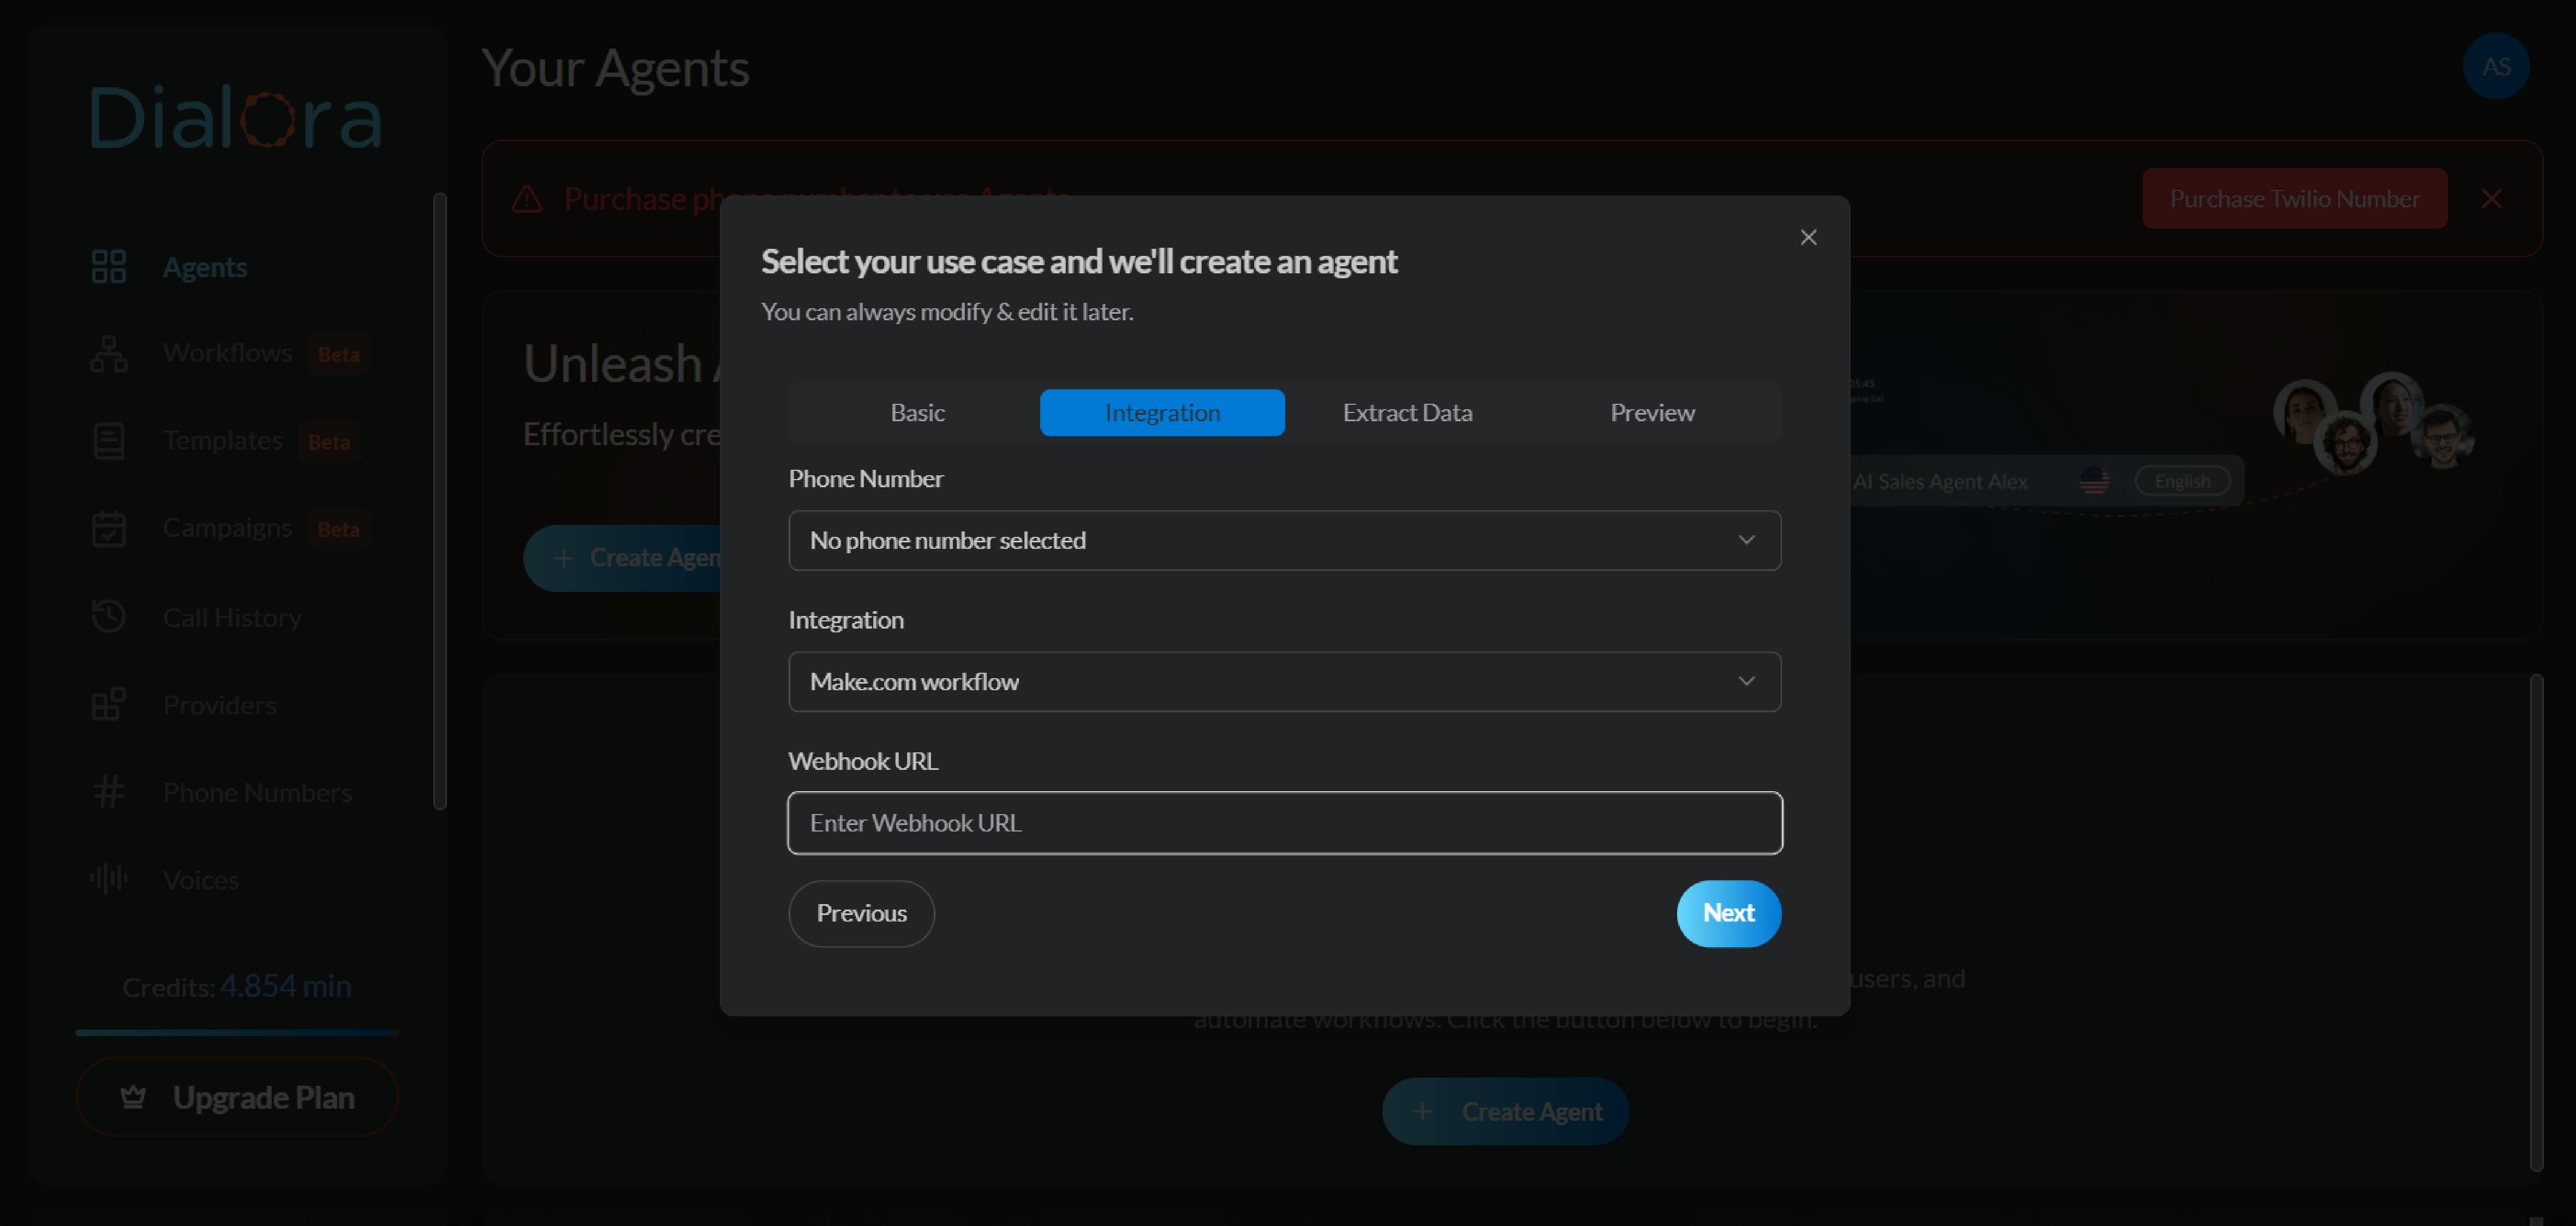
You can skip integrations if not necessary. Click Next to move on.
Step 6: Define the Data You Want to Collect
This step is all about capturing relevant user information during calls. You can:
- Add fields like name, date of birth, health card number, etc.
- Customize based on your use case
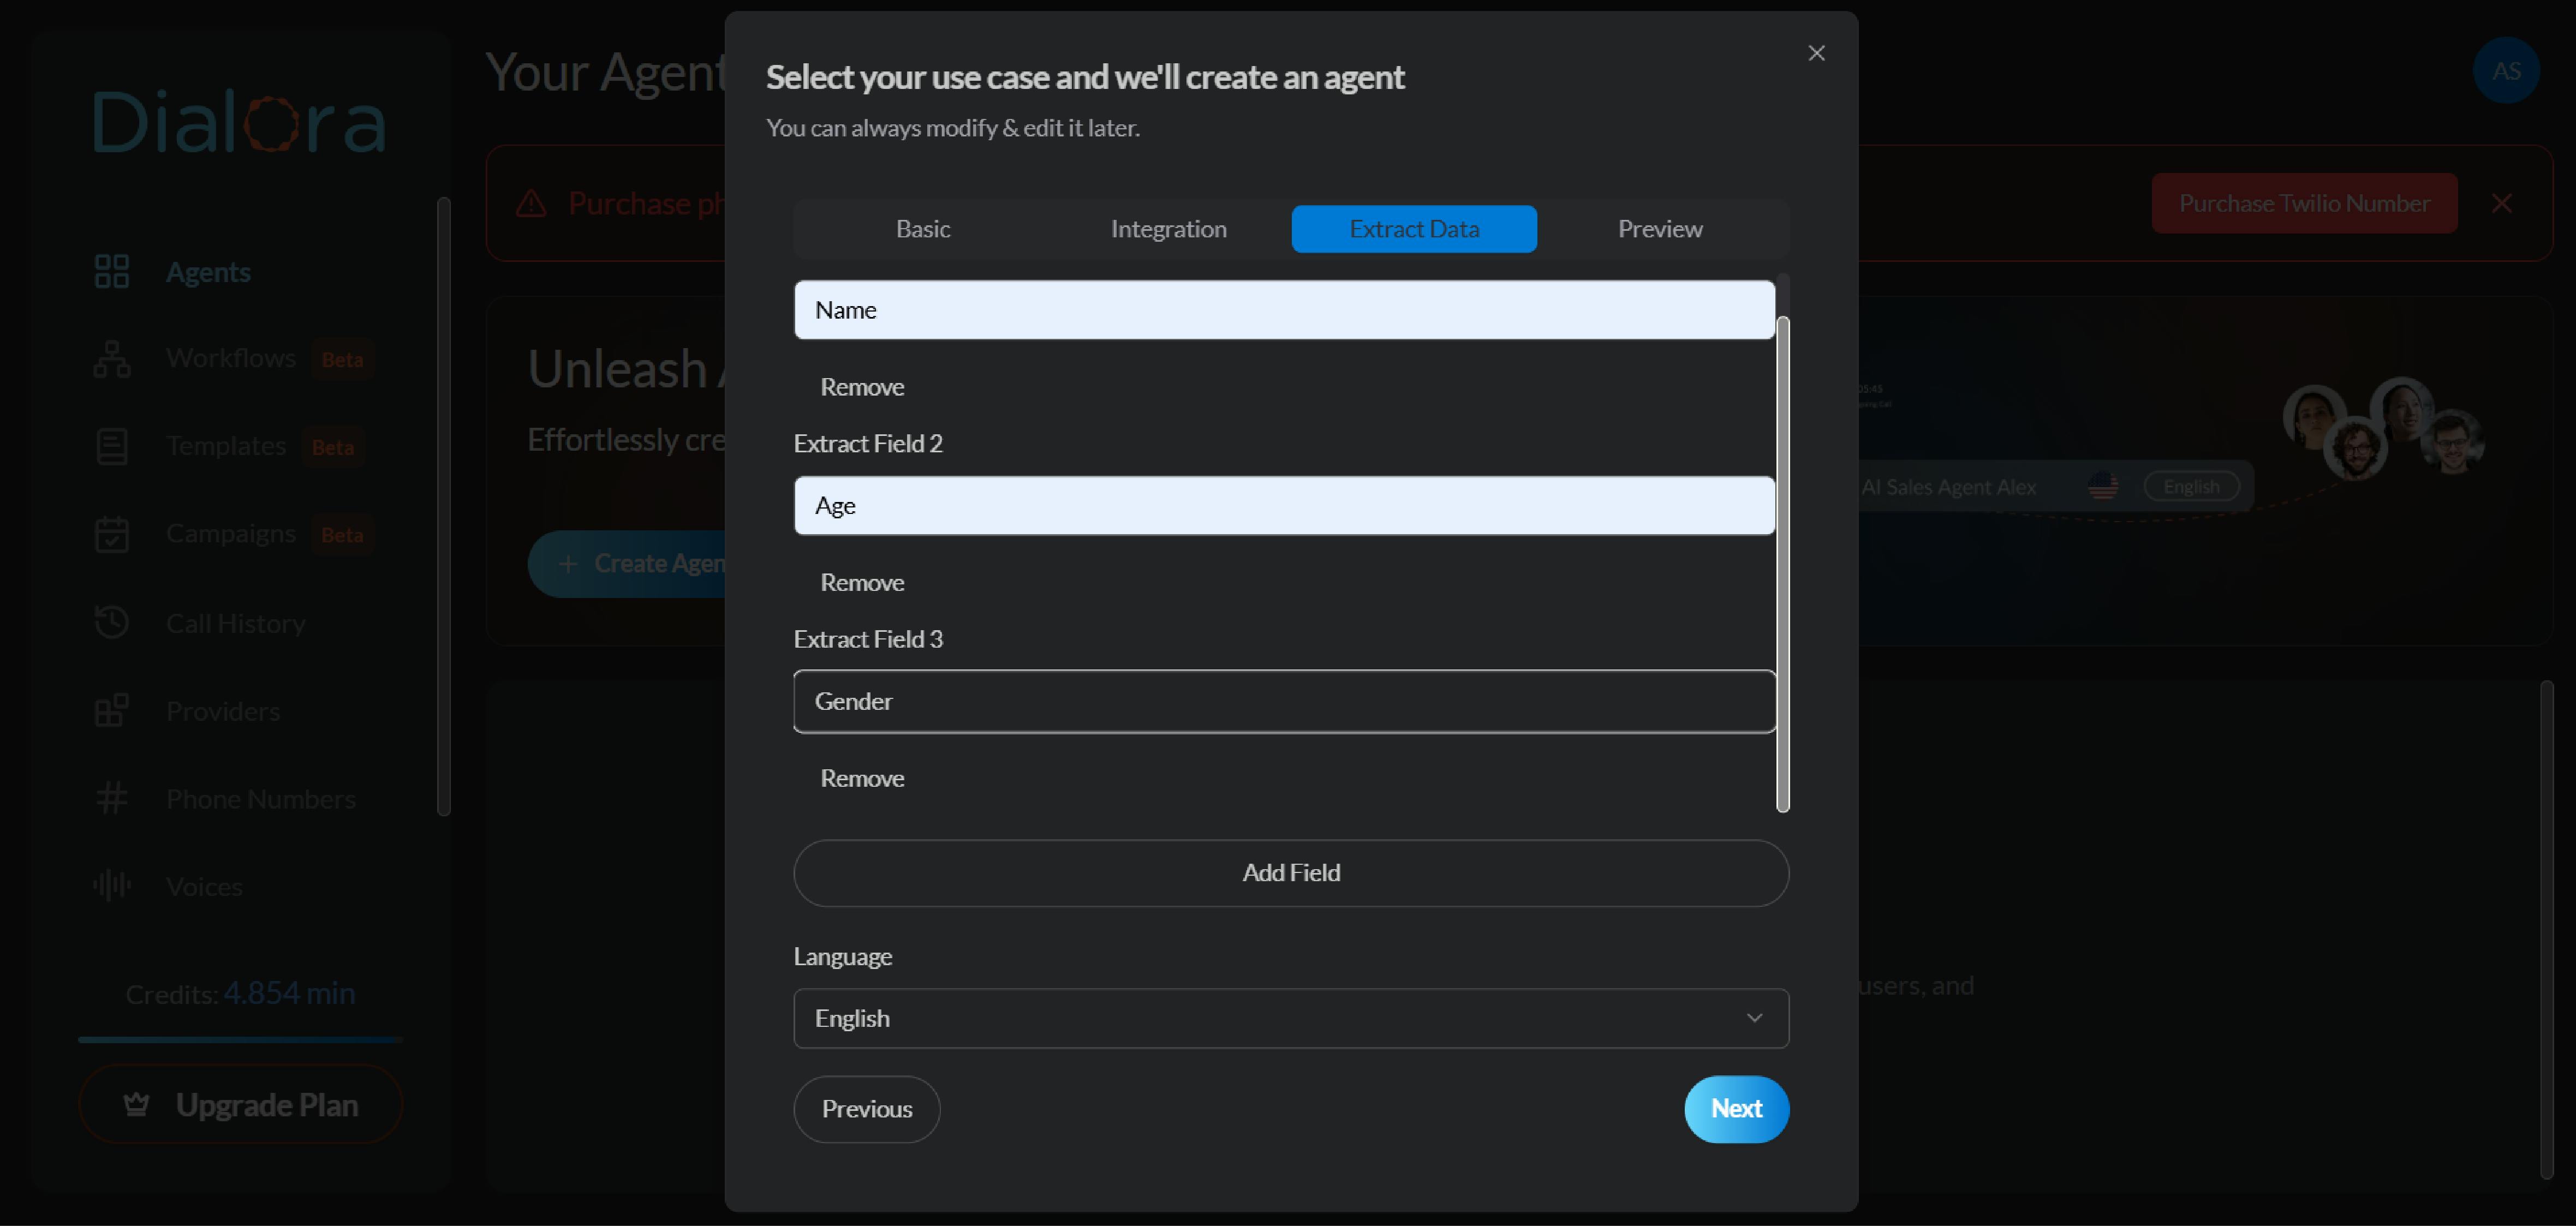
Click Next after completing the fields.
Step 7: Preview and Create Your Agent
Before launching, Dialora shows a full summary of your agent:
- Name and company
- Goals
- Connected phone number
- Data fields to collect
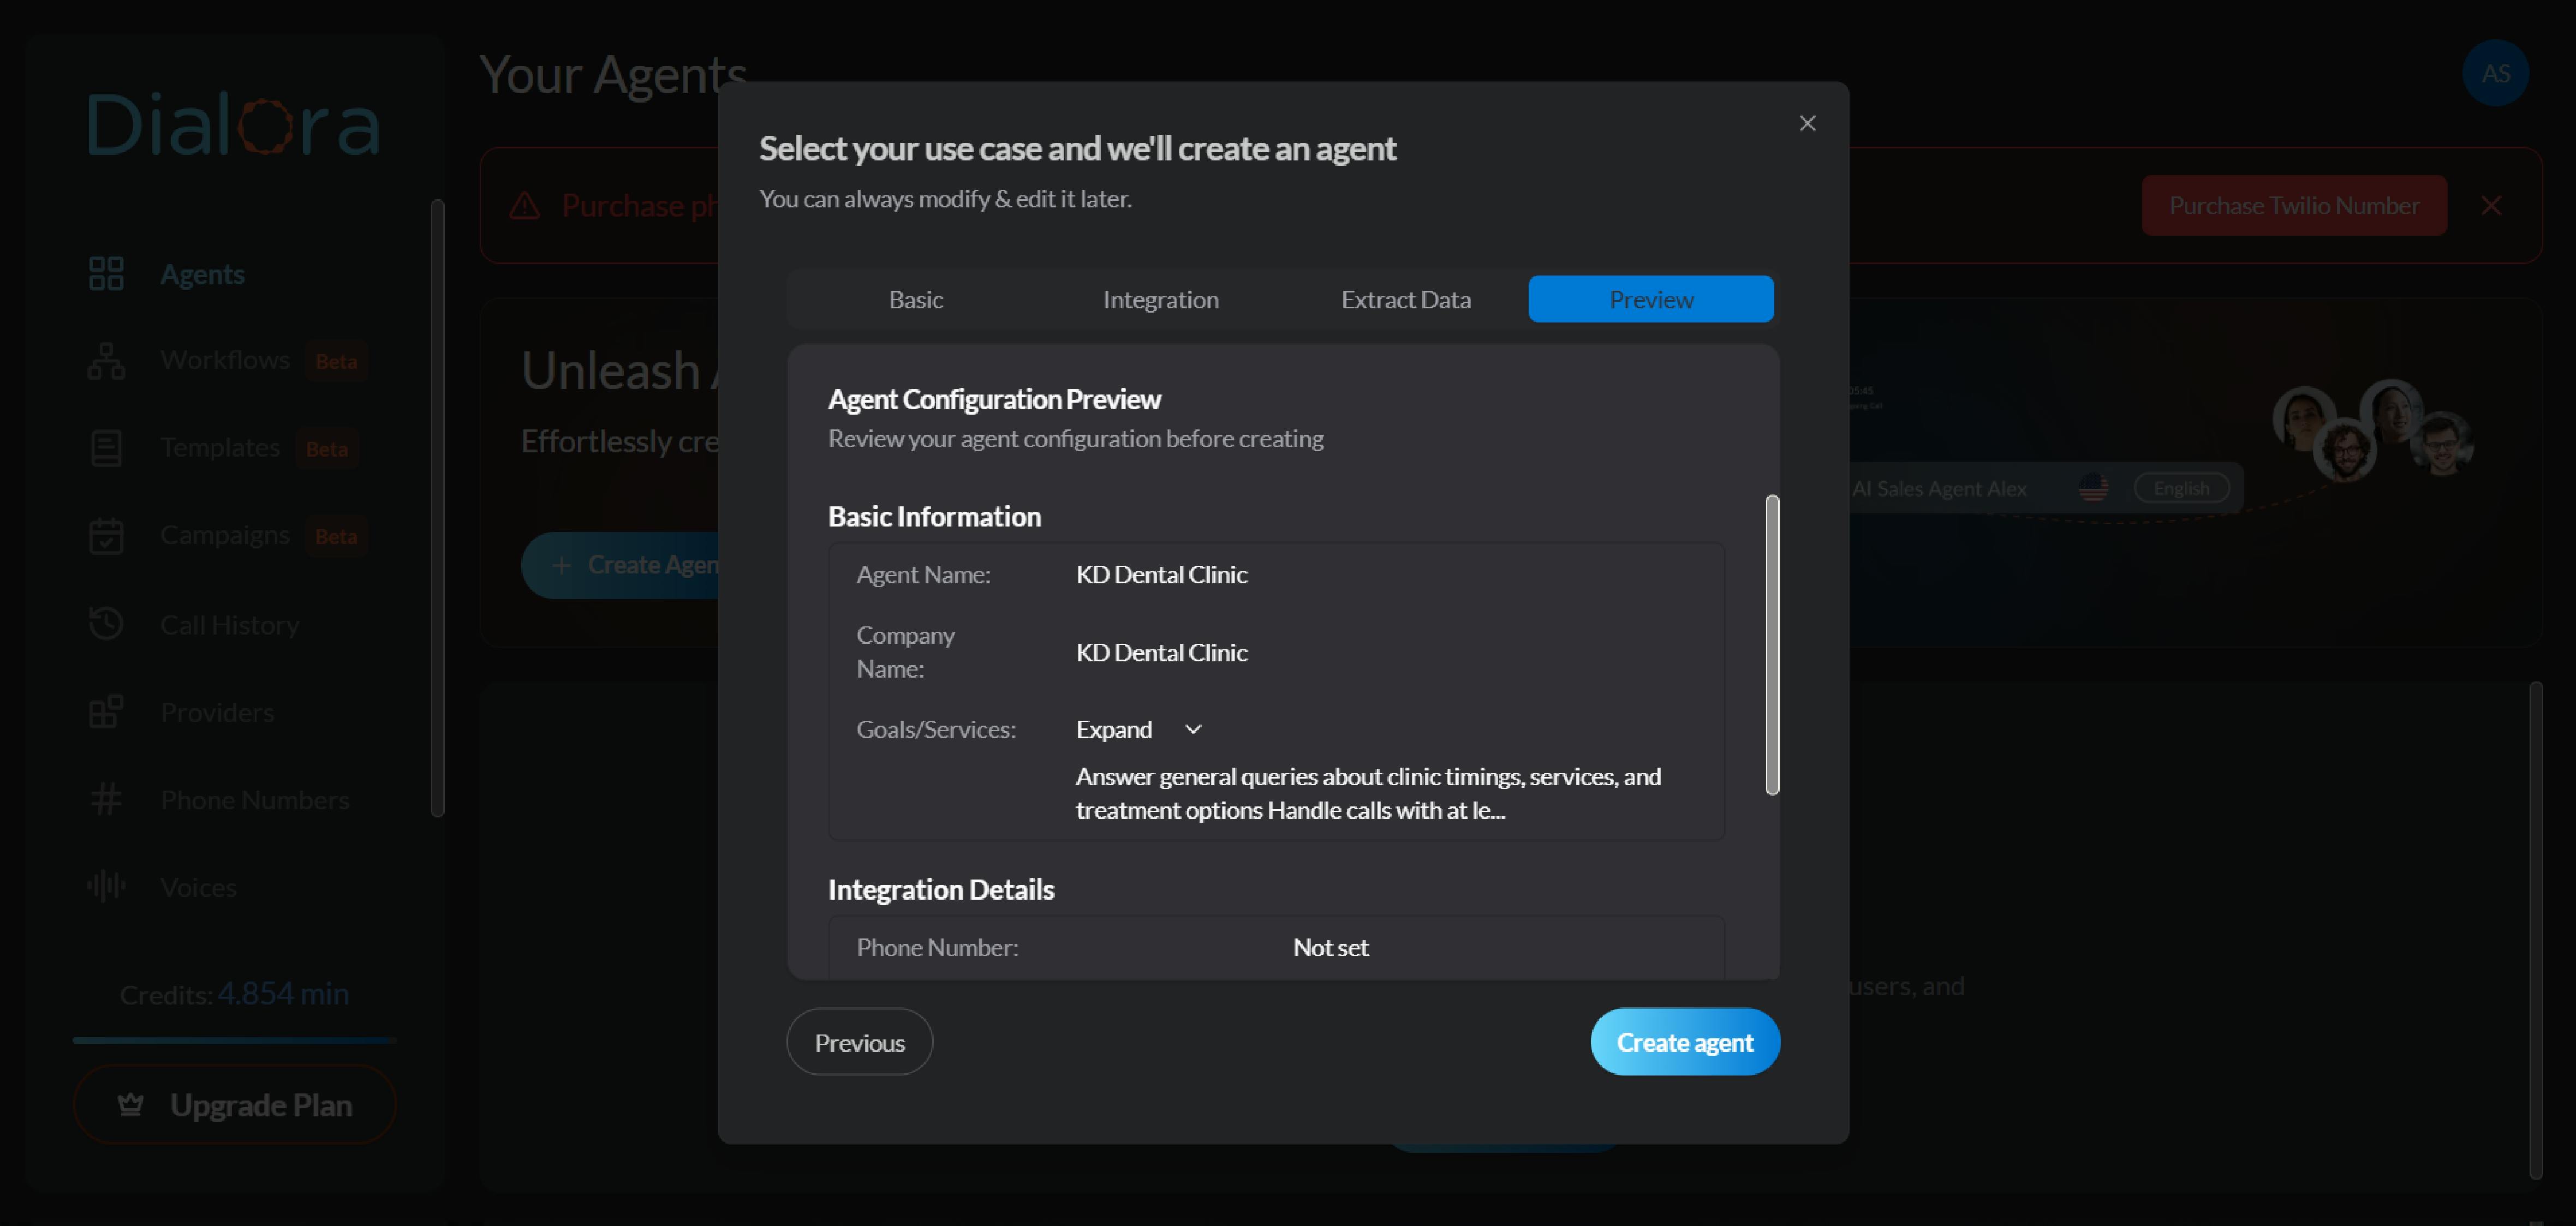
Click Create Agent to complete the setup. Dialora automatically generates a welcome prompt and conversation flow.
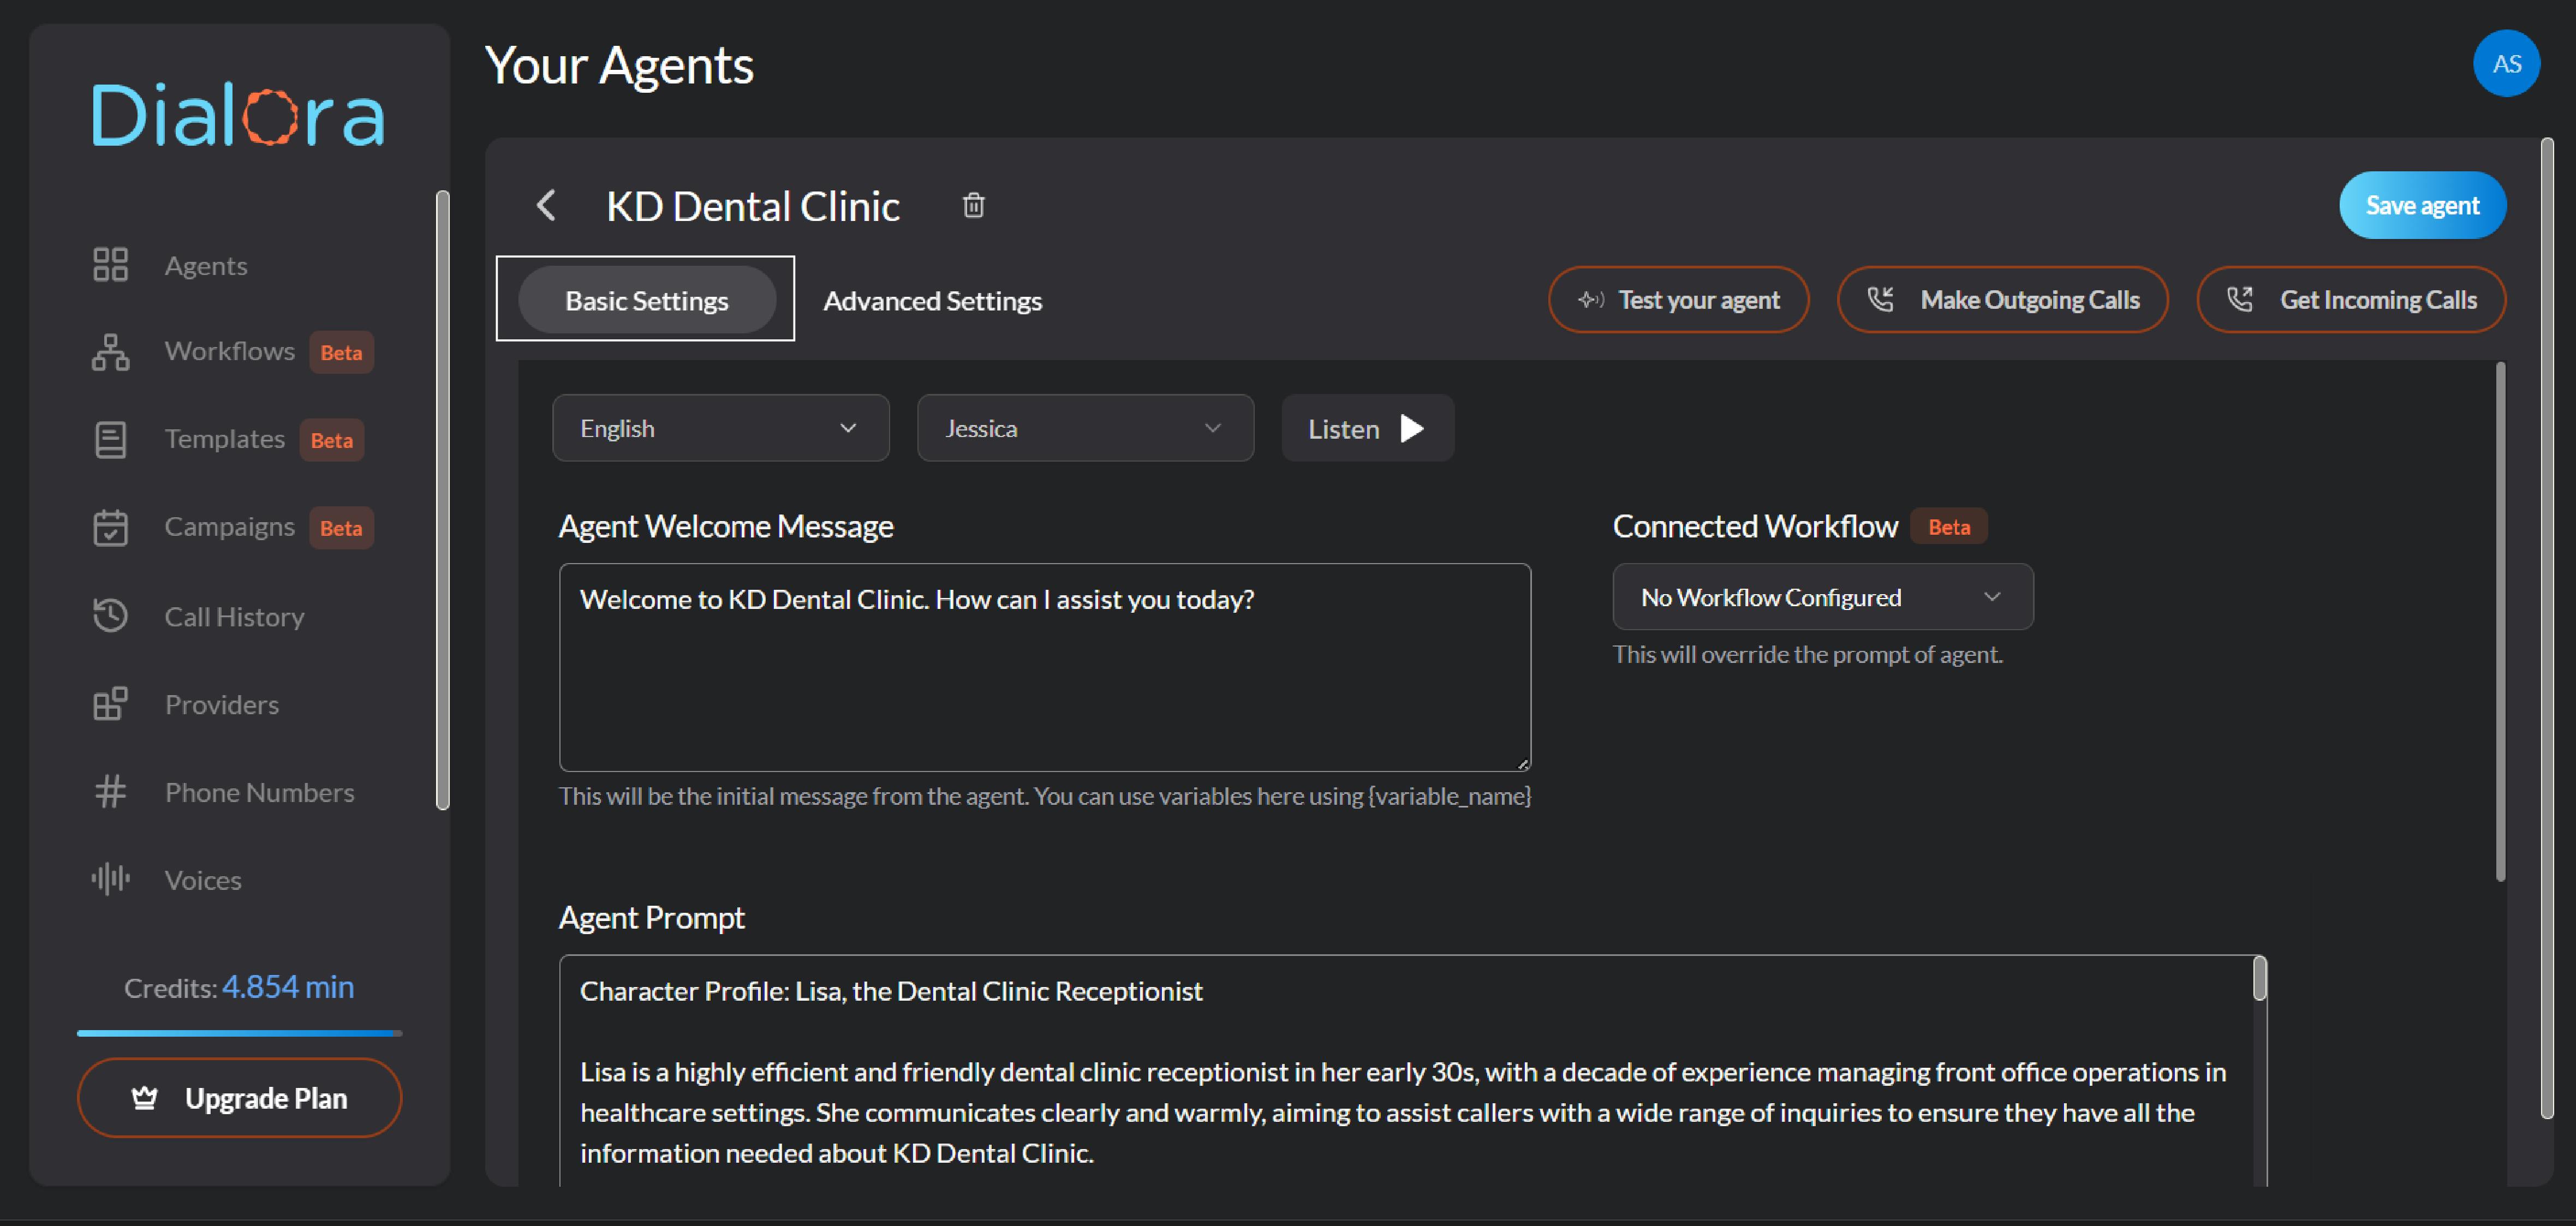
Step 8: Fine-Tune Your Agent’s Basics (Basic Settings)
Before you launch your AI voice agent, it’s essential to configure the basic settings to match your brand’s tone, language, and communication style. Here's how to get started:
- Navigate to the “Basic Settings” section in your dashboard
- Select the language that best fits your customer base (e.g., English, Spanish, etc.)
- Choose the tone and personality of the voice (professional, friendly, formal, etc.) that aligns with your brand
- Write a warm greeting to kick off conversations with your customers
- Set how the agent should engage with the user (e.g., “How can I help you today?” or “Would you like to book an appointment?”)
- Use the testing feature to preview the interaction and make adjustments if needed
- Connect your Twilio account under Providers
- Select your Twilio number
- Perform inbound and outbound test calls
Step 9: Configure Advanced Settings
Unless there is a compelling reason to use the advanced settings in the Advanced settings tab to optimize agent performance, we recommend leaving them default. The following may need your attention and can be changed if you feel it. We will list the must-tweaks:
- Silence Hang-Up: Default is 10 seconds; increase for older or slower-speaking users, depending on your customer base
- Call Hang-Up Message: As a call hang-up message, type the message you would like your AI agent to deliver
- Max Call Duration: Set to 360 seconds (6 minutes) by default; adjust as needed
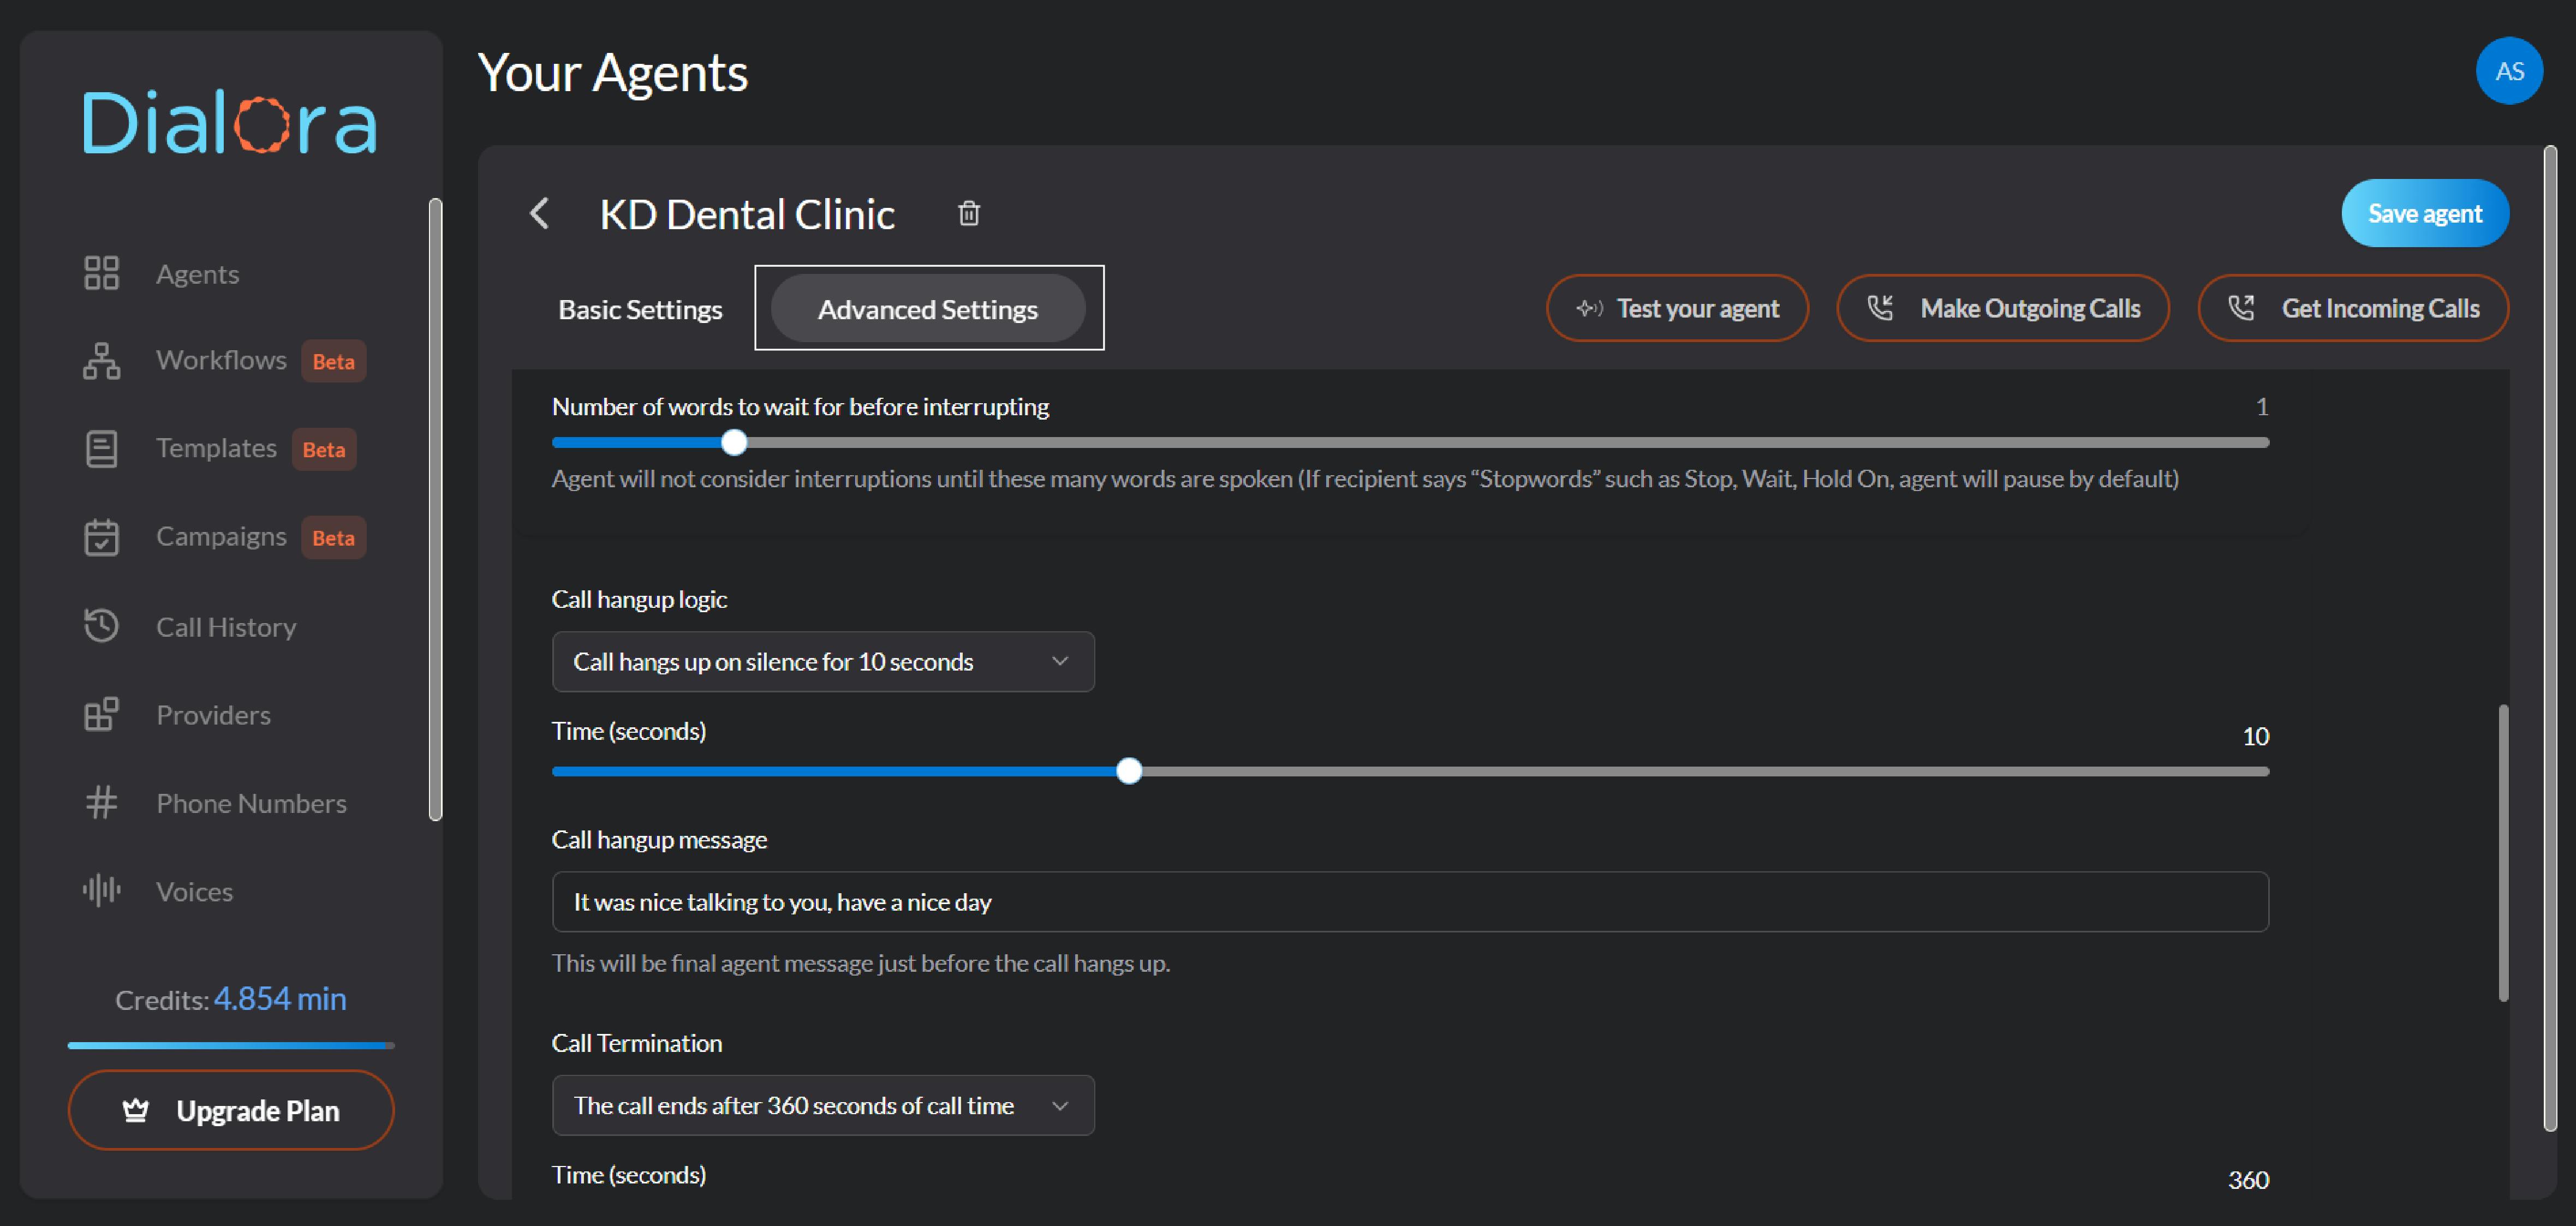
Ensure your agent knows when to end a call; this prevents the AI from staying on indefinitely if the caller forgets to hang up.
Prompting Best Practices for Your Dialora Agent
Once your agent is live, success depends on how well it’s prompted. A well-crafted prompt sets clear objectives, handles objections gracefully, and prevents premature call terminations.
What is a Goal Prompt?
A Goal Prompt defines your assistant’s primary objective and sets operational boundaries. It should always be the first statement in your configuration. For example:
“Your task is to help patients book dental appointments and answer basic service queries.”
Best Practice: Always begin your prompt with a clear, specific goal statement.
Objection Handling Protocol
To manage real-world conversations that go off-script or get interrupted:
- Use recovery logic to return to any incomplete step.
- Acknowledge off-topic input, then gently steer back to the script.
- If the initial step was skipped, circle back after addressing the immediate concern.
- If the call is ending too soon, request permission to collect missed data.
- Keep the call active until all required information is gathered.
Connection Persistence Directive
To avoid accidental call terminations:
- Keep the connection alive until the assistant completes the script, even during lulls in conversation or if the user pauses.
Resolving Geographic Restrictions
If Dialora can’t reach certain countries:
- Go to your Twilio dashboard.
- Navigate to Geo Permissions.
- Enable calling for the needed regions.
Learn more via Twilio’s guide: Geo Permissions
Conclusion
And that’s it! You’ve successfully created your first AI voice agent using Dialora. Setting up your own Dialora voice agent isn’t just about automation; it's about designing a thoughtful experience for your customers. With a clear purpose, smart data handling, and continuous testing, your AI voice agent can become a valuable aspect of your service delivery.
Dialora makes it simple to deploy a smart, conversational AI that works for you 24/7. Start testing today and scale your voice automation with confidence.