Custom Tools API for Third-Party Integration
Connect any third-party API directly to your voice agent. Enable real-time data lookups, CRM updates, booking confirmations, and more.
Overview
The Custom Tools API allows your Dialora agents to interact with external systems during conversations. Your agent can:
- Query Databases: Look up customer records, inventory, pricing
- Update CRMs: Create leads, update contact info, log interactions
- Manage Bookings: Check availability and confirm appointments
- Send Notifications: Trigger SMS, email, or push notifications
- Retrieve Data: Pull information from any REST API
Use Cases
- Booking Systems: Check availability, reserve time slots, send confirmations
- CRM Integration: Update Salesforce, HubSpot, or any custom CRM
- Database Lookups: Query customer history, account status, policies
- SMS/Email Triggers: Send follow-up messages after calls
- Payment Processing: Validate payment methods, process refunds
- Inventory Management: Check stock levels, reserve items
Step 1: Identify Your API Endpoint
You need a REST API endpoint (URL) that your agent will call. Example:
https://api.yoursystem.com/lookup-customerYour API should:
- Accept POST requests with JSON data
- Return JSON responses
- Include proper authentication (API key, OAuth, etc.)
- Complete within 5 seconds
Step 2: Log In to Dialora
- Go to Dialora and log in to your account.
Step 3: Navigate to Data Integration & Tools
- Open the Dialora dashboard and go to Agent → Agent → Advanced Settings → Data Integration & Tools.
- Click Add Custom Tool.
- Go to custom tools settings.
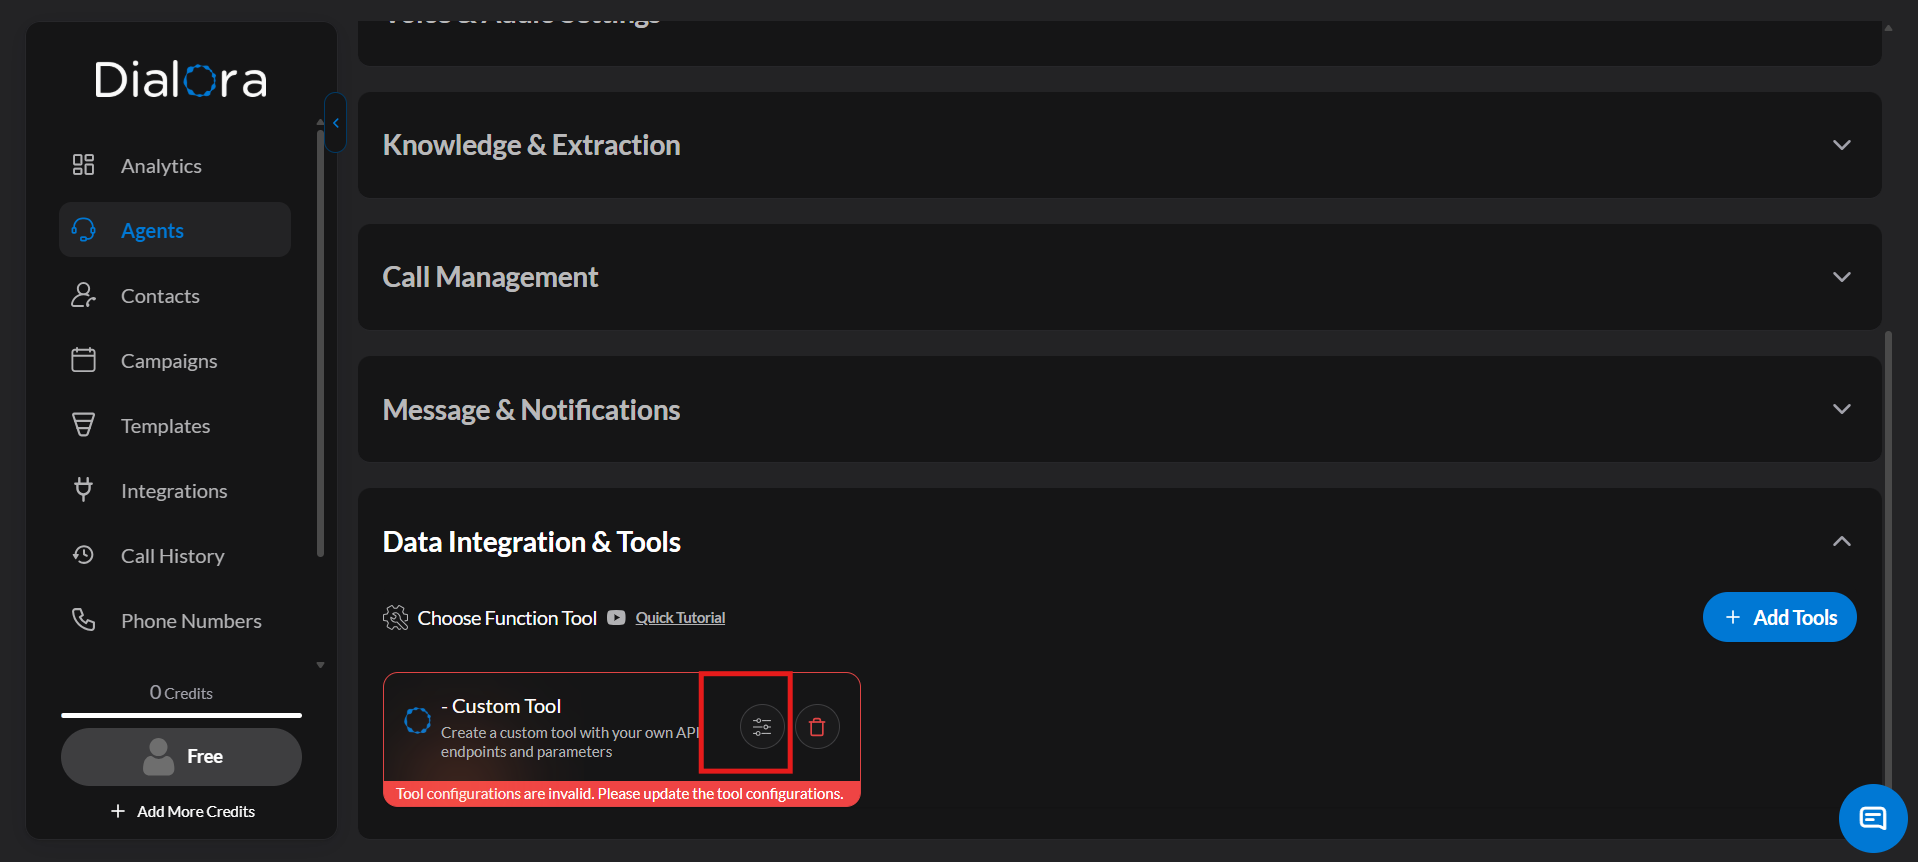
You can add your custom tool in two ways:
- Form View — Configure your tool using the visual form
- JSON Configuration — Connect your tool using the JSON file (we recommend this method)
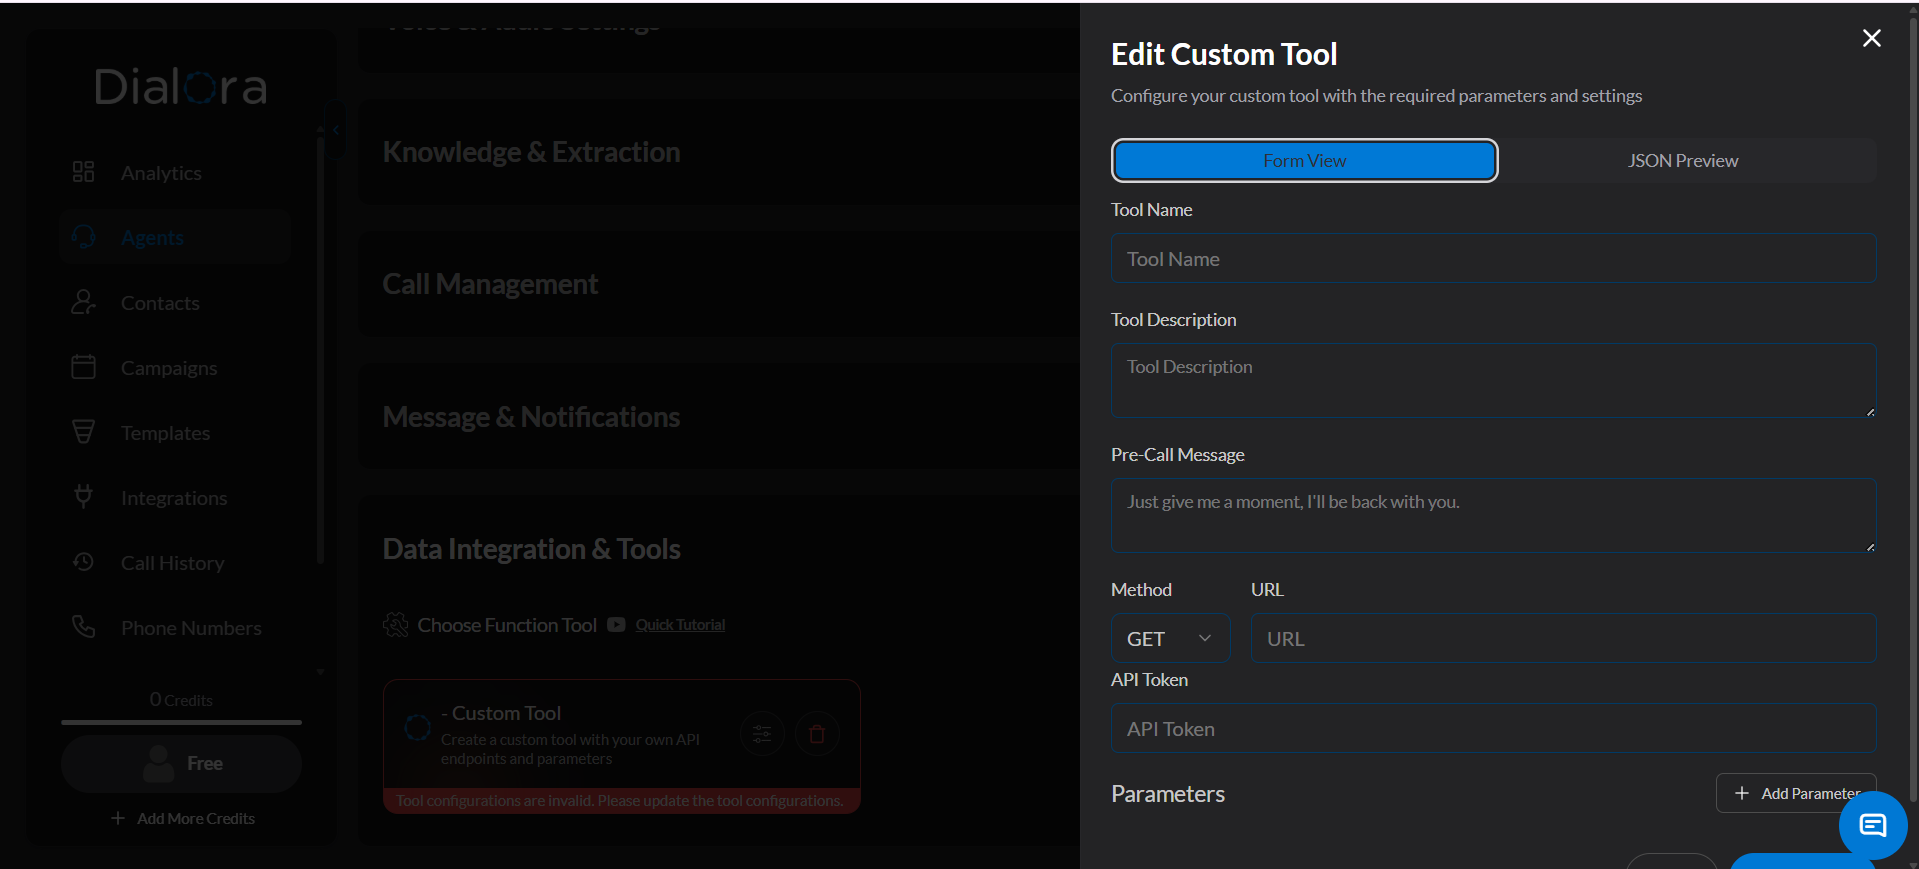
Step 4: Configure the Custom Tool
- Enter a tool name (e.g., “Customer Lookup”).
- Paste your API endpoint URL.
- Select request method: POST or GET.
- Add API token for authentication.
Step 5: Define Parameters
Specify what data your agent should send:
- Parameter Name — The field name your API expects
- Type — Data type (string, number, boolean, etc.)
- Description — Explain the parameter so the agent knows when to use it
- Set parameter names to match your API’s expected fields
- Mark required vs. optional parameters
- Click Save to save your configuration
Important:
Never hardcode secrets in your agent prompts. Use Dialora’s authentication settings to store API keys securely.
Tip:
Start with a simple test endpoint. Once working, add complexity and additional business logic.