Capturing Data From Your Calls
Your agent can record specific details from every conversation — the caller’s name, the date they asked for, whether they wanted a callback. You decide what to capture, and Dialora reads it out of the conversation once the call has finished.
Everything you capture appears on the call in your dashboard, and is sent on to whatever you have connected: your CRM, your automations, your webhook.
Where to find it
- Go to Agents in the left sidebar and open your agent.
- Click the Advanced Settings tab.
- Expand the Knowledge & Extraction section.
The Extract Data part of that panel is where you define what to capture. Each detail is shown as its own card, with the kind of answer marked on it.
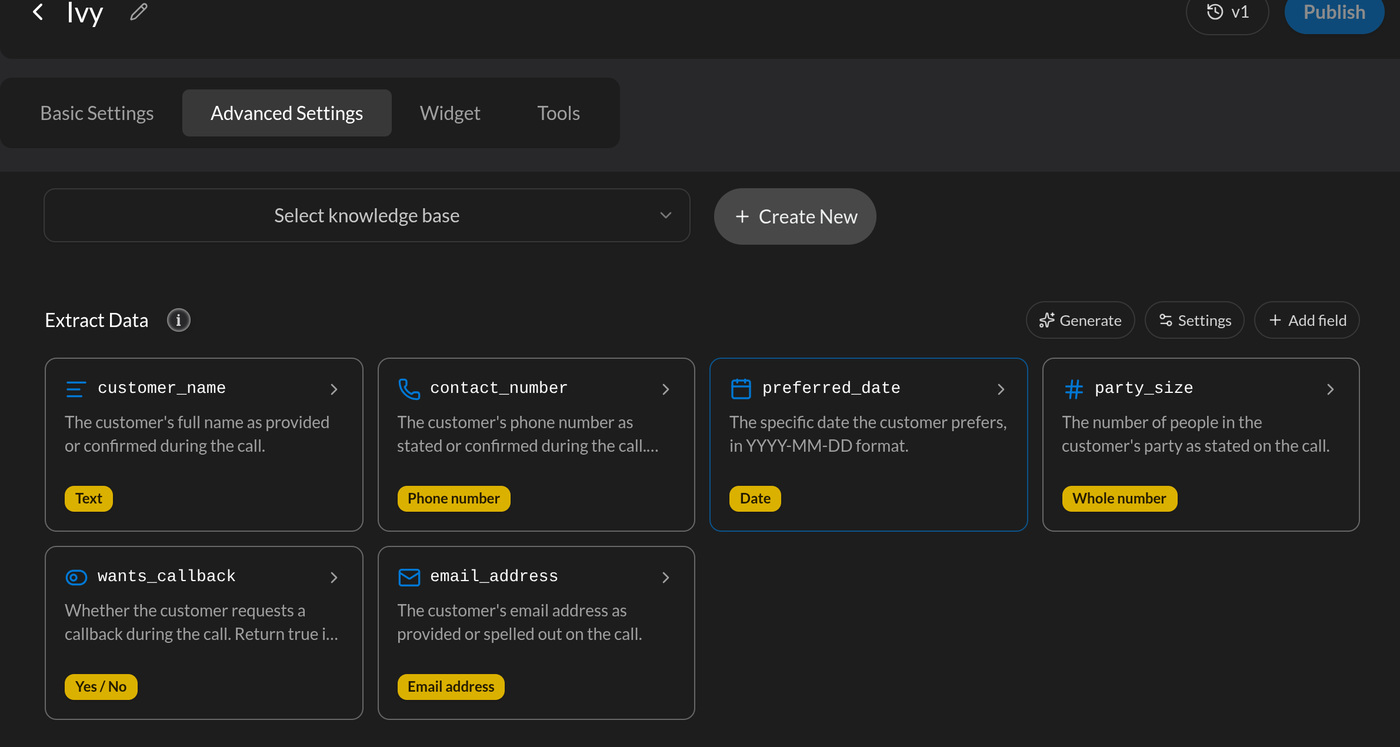
Agents created before this feature show a single large text box here instead of a set of field cards. Both work. If that is what you see, jump to Using the older setup — and then to Switching to the new format when you are ready.
What your agent can capture
Each detail you want recorded is one field. A field has a name, a kind of answer, and a description telling the agent what counts.
Choosing the closest kind is the single most useful thing you can do, because the agent is held to it — and because contact details get cleaned up on the way through.
| Kind | Use it for |
|---|---|
| Text | Names, notes, anything else |
| Choice | One option from a list you define |
| Yes / No | A true or false answer |
| Number | Any number |
| Whole number | A count, like number of guests |
| Date | A calendar date |
| Date & time | A date with a time |
| Email address | Cleaned up and checked automatically |
| Phone number | Saved in international format |
| Website link | A full web address |
Number accepts decimals; Whole number does not, so use it for anything you would count.
Add a field
Step 1: Open the field editor
Click Add field.
Step 2: Name the field
Give it a short, lowercase name with underscores instead of spaces — customer_name,
preferred_date, party_size.
This name is how the value appears everywhere else: in your webhook, in your CRM field mappings, and as a {placeholder} in email and SMS templates. Renaming a field later will break anything already pointing at the old
name, so it is worth choosing carefully the first time.
Step 3: Choose what kind of answer it is
Pick from the list above. Each option carries a one-line description in the dropdown if you are unsure.
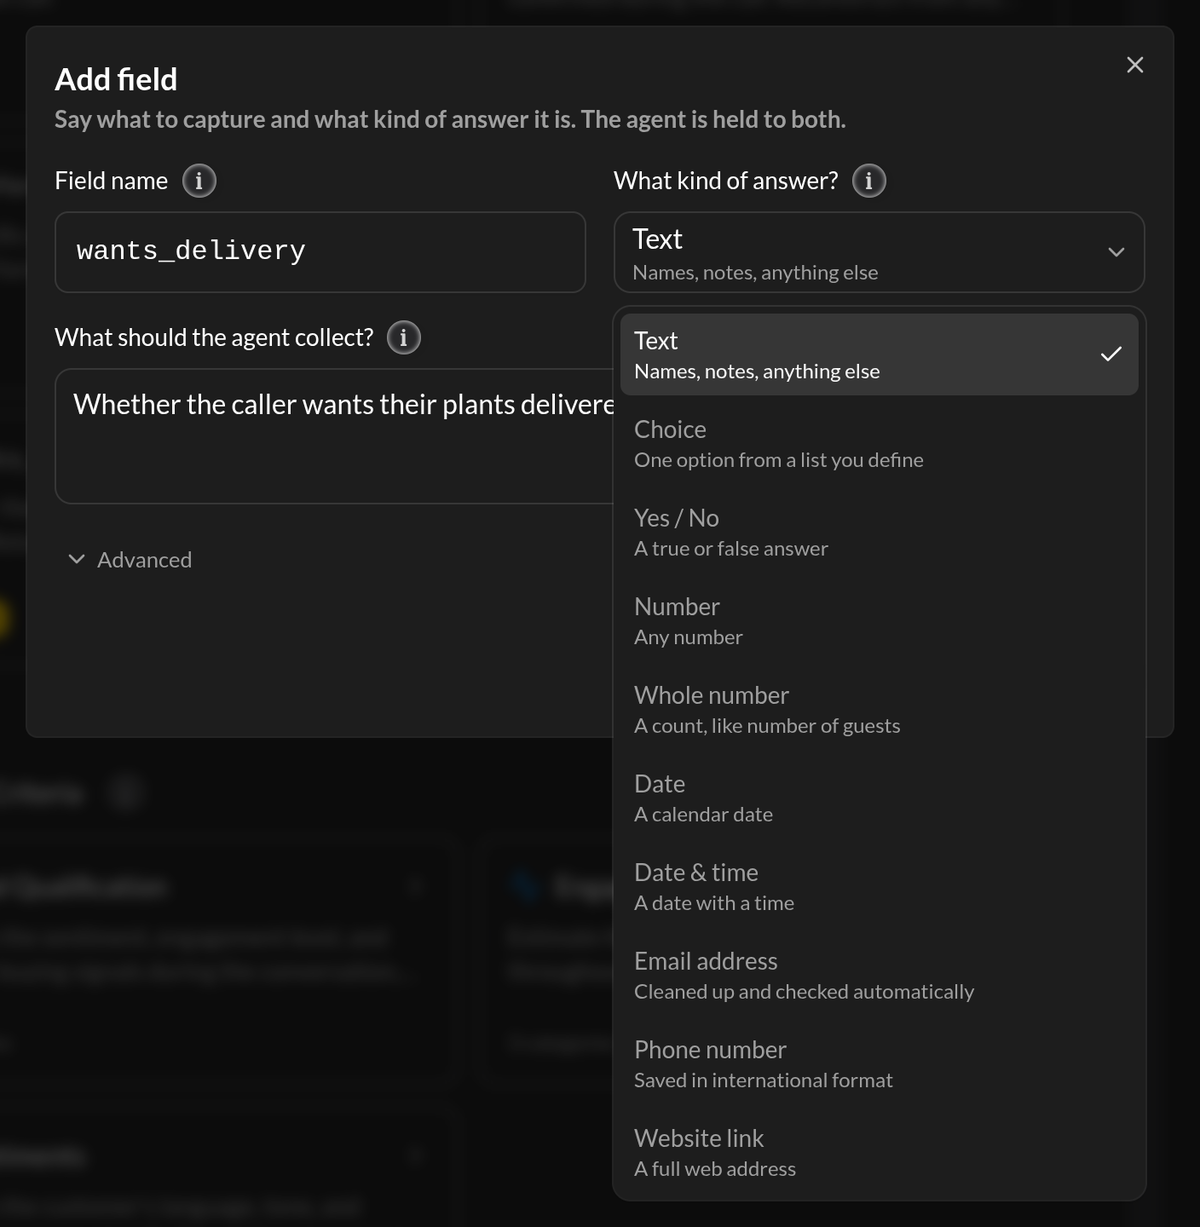
If you pick Choice, you also list the allowed answers and describe when each one applies. Three to five works best, and it helps to include an option for “none of these”.
Step 4: Say what the agent should collect
Write it as an instruction — what counts as the answer, and what form to record it in. For example:
The caller’s full name, as they confirmed it.
The date the caller chose for their appointment.
Step 5 (optional): Open Advanced
- Examples — one or two answers written exactly as you want them stored. This is the quickest way to pin down formatting.
- Required — flag the call when the agent finishes without capturing this.
- Minimum and Maximum — for Number and Whole number fields only.
Let Dialora suggest the fields
Click Generate and Dialora reads your agent’s prompt to work out what the call is for, then proposes a set of fields with their kinds already chosen.
You can leave the box empty and let the prompt do the work, or paste in anything that describes what you need — a list, some notes, or a conversation you had with ChatGPT while working it out.
Nothing is applied until you say so. You will see:
- New fields, ticked and ready to add.
- Updated fields, left unticked — these are rewrites of fields you already have, so you opt in rather than having your own wording replaced.
Anything you already have that Dialora did not suggest is left exactly as it is. Generating never removes a field.
Settings that apply to every field
Click Settings to set two things for the whole agent:
- Model — which AI model reads the transcript. The recommended default suits almost everyone.
- Extra instructions — guidance that applies to every field, for the things a single field description cannot say. For example: “Prices are in AUD”, or “Treat a mobile and a landline as the same number.”
What the captured values look like
Each kind produces the sort of value you would expect: Text gives you text, Number gives you
a number, Yes / No gives you true or false, and Date gives you a date in YYYY-MM-DD form.
Two are actively tidied up on the way through:
- Phone number is reassembled into international format, so a caller reading out
“plus one, eight, eight, nine…” is stored as
+18896335677. - Email address is reassembled from spoken form — “j o h n at gmail dot com” becomes
john@gmail.com.
If the caller never gave an answer, or gave one that was never confirmed, the field arrives empty rather than guessed at. That is deliberate: an empty value is honest, and it is safe to check for in your automations.
For the exact shape of what arrives at your webhook, see What a finished call sends you.
Using the older setup
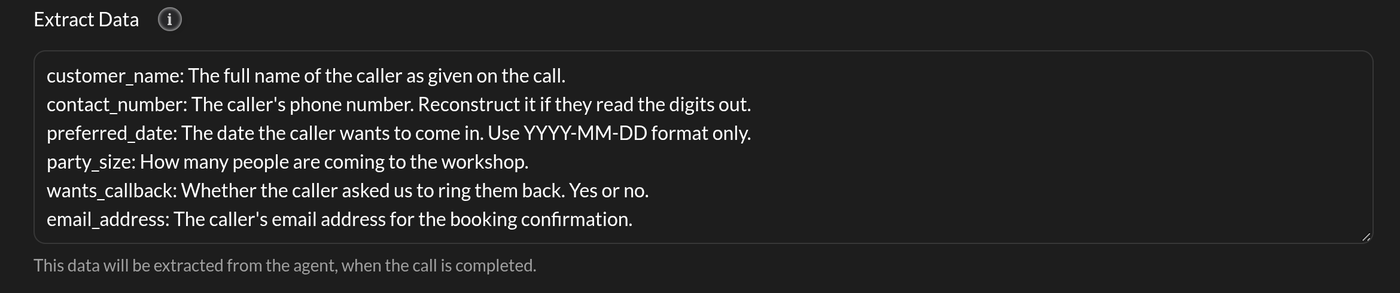
Agents created before this feature describe what to capture in a single text box, as a list of items and what each one means:
customer_name: The full name of the customer as provided during the call.
appointment_date: The date the caller chose. Use YYYY-MM-DD format only.
This still works exactly as it always has, and nothing changes until you choose to switch. The difference is that everything captured this way comes back as plain text — a date is text, a count is text — and there is no checking of phone numbers or email addresses.
Switching to the new format
Above the text box you will see a panel offering Switch to the new format.

- Click it. Dialora reads what you capture today and turns each item into a field, choosing the kind from how you described it — an item mentioning a date becomes a Date, one asking for a phone number becomes a Phone number.
- Your existing names come across unchanged, so anything already pointing at them keeps working.
- Review the list and untick anything you do not want.
- Click Switch and add fields.
Switching updates your draft only. Your live agent carries on with its current setup until you press Publish, so you can look at the result and change your mind.
If Dialora cannot make sense of what is in the box — it happens, especially if notes or a prompt ended up in there — it will tell you, and offer to switch you over with an empty list so you can add fields yourself.
Where the captured data goes
- On the call itself, in Call History
- In your post-call webhook
- Into connected tools such as GoHighLevel, Pipedrive, Make.com and Zapier
- As
{placeholders}in your email and SMS notification templates - In your CSV exports